

Ronin difficulty finds a weird balance between fairly doable and absurdly cheap. I’ve been killed by enemies who didn’t even move their sword and overwhelmed foes to the point where they’re not an issue. The trick is really to understand what needs to be done and master timing. Obviously this goes without saying, though there are some tips/tricks to make Trek to Yomi‘s Ronin difficulty and higher a lot more doable.
How to Beat Trek to Yomi’s Ronin Difficulty
General Tips
Know What to Do
There are two universally helpful tips in Trek to Yomi. The first is to learn what attacks each enemy likes to throw out. A big part of beating the difficulty is to know what your first move needs to be. Sometimes it’s just striking first, other times it’s waiting for the parry. In 100 percent of cases the parry is the smarter case, as it takes any uncertainty out of combat, though it can be boring and often make fights longer. Another is knowing the timing, as a well timed heavy hit can dominate most foes.
Explore Different Paths Looking for Shrines
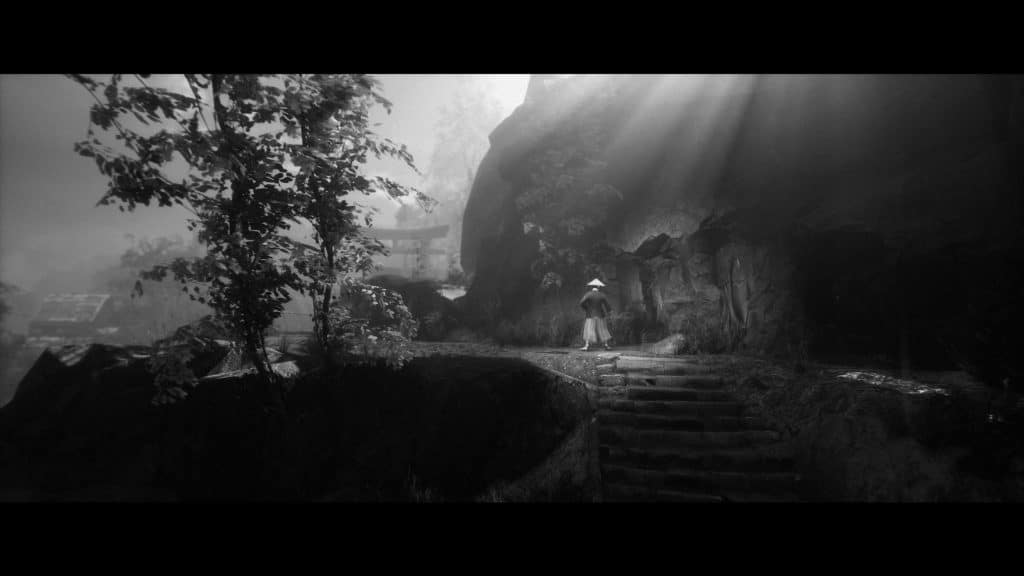
The other is exploration. Not only does this give health, stamina, moves and other enhancements, there is commonly ranged weapons, collectibles and a shrine. While all the other stuff is great, the main objective is to find the shrine, as that acts as a checkpoint. One good example of what I mean is the image above. Before using the shrine, the location in the rocks will glow. It’s easy to overlook, but going there will refill your health and more importantly save you from having to fight all the enemies below, plus the three others waiting for you on the bridge.
Pay Attention to the World
Certain fights can be avoided by simply going another direction. If you pick the wrong direction, you might notice some illuminated item that indicates something can be used to defeat all these enemies. It’s helpful to know and extremely useful to keep track of.
Finishers are Extremely Important
Armored enemies can be some of the most difficult fights, but they can be finished instantly with a finisher. This is explained rather poorly when you unlock it, since parrying is not considered a stun. The simplest stun in the game is back and heavy, though if you’re fighting distance enemies or have issue making that attack work, the next easiest is light, light and then heavy. The advantage to this isn’t just dominating enemies, it’s getting health back to keep the fight going.
Remember Helpful Combos

The location here in chapter three is also extremely important. It’s located on the north path of a fork in the road. If you pick incorrectly, you can tell this path by the scene here above you.
What makes this place important isn’t the resources, as much as the skill you unlock from this building. There is where you get the “staggering rotation combo,” which helps make the most of combat where enemies are on both sides. It’s invaluable for any fight where enemies are on both sides.
Specific Areas
First Boss
There really isn’t much to this boss. What you need to really do is wait for parries and go for heavy attacks. Anything else will use too much stamina and also increase your risk greatly.
Midway through the fight there will be some enemies. These are good to heal yourself with, but if that proves problematic, just quickly slice them down.

First Archer
The first archer is one of the more annoying enemies. What will often happen is he will hit you, take a combo, kick you and you’ll die before you know what happens. It really isn’t explained, but the trick is to roll under his arrow. This is done by taping the spring button and a direction. Another cheesy tip is, if you have four bo-shurikens, simply throw them at him and hope it finishes the job.
Bridge that Falls Apart
Unless you’re extremely good at doing the combo and not having the enemy interrupt you, this section will probably cause a death or two. It makes sense, killing every enemy before the bridge gets you is very annoying and can be rather difficult to accomplish. However, a well timed parry will simply have your character run past the enemy, allowing further progression. Much better than trying to beat everyone fast enough.
Teleporting Enemies
The simplest way to defeat these enemies is to figure out where they’re teleporting to, starting the stun combo and hitting them with either the last hit or second to last hit for an easy finish.
Fourth Boss
The boss for chapter four requires a different tactic. There is some luck that comes into play, but the basic idea is to dodge roll through their attacks and then hit them from behind. I do not suggest using ranged weapons and just stick to safe heavy combos to maximize damage and minimize risk.

Fifth Boss
This is a doable boss, though it requires great timing. Like the last boss, you basically need to keep dodge rolling through his attacks to get an attack in. The really tricky thing isn’t getting every dodge in, as much was always hitting a combo that returns stamina. Without doing that, you run a high chance of running out and dying at some point. When you do get low, use some arrows to get some extra damage while it regenerates.
Sixth Boss
Like the other bosses, the previous tactics won’t work against their fury of attacks. Thankfully, this really seems harder than it is. The first method to beat him is to know your parry timing and punish. Several hits can not actually be parried, so I suggest opting out of this unless you have to. The other method is to be extremely aggressive and when you get pushed, dodge roll to the other side. It’s also good to supplement this method with arrows, as they will push him back and make it easier to survive. If you do find you’re losing a lot, consider taking a step back. All that really matters is being aggressive and knowing when to dodge away.

Full Armored Enemy
This enemy has less health than they seem. Instead of trying to time out parries to defeat them, I just shot a couple arrows and killed them. Much easier than dealing with it. Two shots with the Ozutsu will also kill one.
Final Boss
I’ll be honest, this fight kind of sucks. The final boss not only does a lot of damage, there are a good number of combos that can destroy your health in a second. Thankfully, this isn’t impossible either.
Phase One
The first fight is best done with a starting back heavy attack, followed by the up light, light, heavy combo. If you’re lucky, this can be chained up to three times, though I commonly back off after once since there is also a chance he will get an attack through that practically defeats you. For those without the aforementioned combo, two heavy attacks will also work.
Dealing with his attacks will depend on how much risk you want to take. With near max stamina it is possible to just guard through it all and wait for him to fall back. If you don’t want to do that, wait for an attack you know you can parry and use the aforementioned combo. Getting greedy is what kills you, so don’t push if you don’t have to.
As a final “trick,” there is a glitch if you die while killing him, you’ll start the next phase with full health. It’s hard to trigger but good to attempt if your run is practically there.
Phase Two
This can be a really frustrating phase, as he gains supernatural powers. These include two explosives and a flame attack. The explosives will kill you, with the flame doing considerable damage if you do anything near them (even if you parry behind him into it).
What you’ll want to do is let him do the explosion and then he will almost always use his flames. Dodge roll behind him, do two or so light hits and then back off. He should rush, which can be parried for the previous combo. Usually he gets in a loop and you can either keep parrying him until he hits 50 percent or back off and repeat.
Phase Three
Two enemies will spawn at this point, which are basically a weaker version of the bosses first phase and a normal peon. I suggest trying to stay as close to a wall as you can, since this prevents the other enemy from joining the fight, and just using the light combo. You should be able to get one full rotation and a single additional light on the peon enemy. Keep this rotation up until he dies.
For the boss, I reused the same tactic we used during the first phase. It works and he has a lot more stamina than the one above. I also used arrows to supplement my damage, as those can’t be blocked. Only use them if you’re confident fighting the previous boss again or are not confident in blocking his attacks.
Phase Four
With the final phase there is no difference between the second phase, except when he does the self explosion it stuns him briefly. Repeat the previous rotation, don’t get over confident and enjoy your win.
