
Unlike the previous hard Prince of Persia: The Lost Crown bosses, Menolias really pushes players to master the controls. The trick is less creative usage of skills, but rather learning his rotation and punishing whenever possible. This can make him a rather difficult boss, but not one that is impossible to overcome.
How to Defeat Menolias in Prince of Persia: The Lost Crown
Basic Information
While it’s more than possible to win with no upgrades, it helps to return to Lower City’s The Haven destination. Here you can speak to a couple different venders and upgrade your gear. The latter is especially helpful as the right build can be surprisingly broken.
Since this is a Metroidvania experience and what you have access to will vary based off how much you’ve explored, we simplified the process by listing what we think are the best amulets.
Best Amulets
- Blade Dancer
- Void Blade
- Verethragna’s Wrath
- Turning Wind
- Will of Rostam
- Wolf-Bride
- Dragon King
- Mount of Damavand
Now it is not possible to wear all these amulets at the same time. We suggest picking and choosing based off your individual skill. Those who can dodge/avoid damage will want to build towards power, whereas those who struggle should go the defense route.
It also helps to note several of these have little to no value depending on the fight. As much as I love Blade Dancer, several bosses won’t allow you to perform the full combo. Likewise, with Void Blade and other damage boosting amulets it’s possible to hit a point where normal enemies die long before the combo happens as well. Still, it’s better than nothing.
For this specific boss we do suggest Athra Surge boosting items if you need them. These should be paired with Verethragna’s Smite, with Bahman’s Breath for a clutch heal.
Purchasing additional arrow capacity also helps for this fight.
Finally, launching him in the air and maintaining an aerial combo does wonders. It unfortunately can’t stun lock him forever, he breaks out at five or six hits, but it is a lot of free damage.
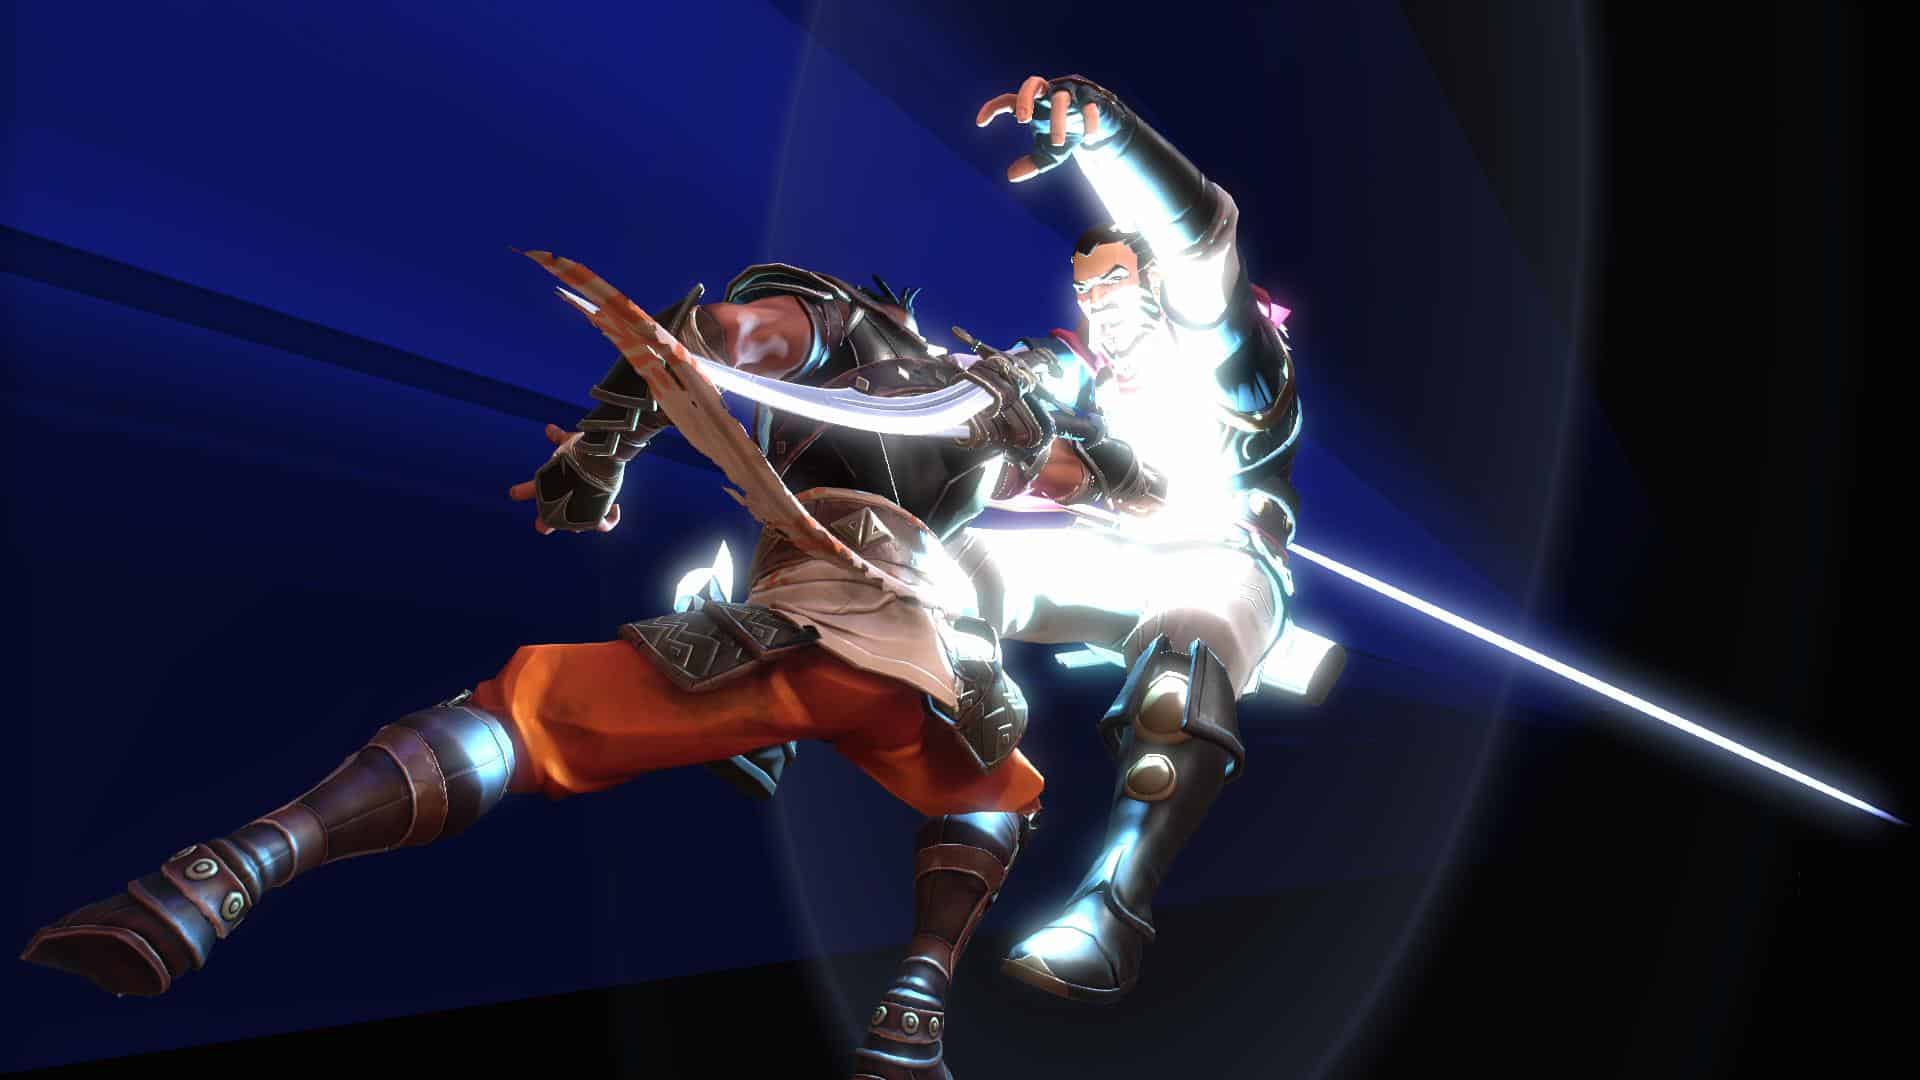
Menolias Phase One
The first phase is a good introduction to his gameplay loop. There is a charged bow shot, a move that makes various stars appear on the battlefield, and an aerial bow shot. Sometimes he will do a yellow arrow attack as well. If you see this a well timed parry should reflect into him for a brief stun.
What you really need to do is put pressure on Menolias. As long as you know the aerial bow shot can be avoided by jumping yourself (or using Shadow of the Simurgh to obtain a better position), and the charged shot will usually miss if you’re in the air, the only problem will be the stars. These can be destroyed by striking them first, something I strongly suggest focusing some attention on before dealing with Menolias.
Transition Phase
His transition phase is an extended bit where arrows rain on the battlefield. Their positioning is random, so I suggest staying towards the middle, and trying to avoid as many as possible.
Menolias Phase Two
During the second phase he will gain another throwing attack, shoot two charged arrow shots, and other minor changes. The big thing isn’t any of his existing attacks, but rather his parry.
Occasionally Menolias will have a flame aura around him, which will result in a devastating combo if you strike him. Thankfully, this can be somewhat avoided. Instead of being a random attack, he will do it almost immediately after the second phase starting, followed by doing it after like 30 or so seconds. Once you think he is due for the attack, simply keep the pressure up without attacking him between moves. Eventually he will do this, you can Verethragna’s Smite for considerable damage.
There is also a quick strike move that can be parried. He typically does this after throwing the Chakram, so if you avoid it be prepared for it. If you’re not great at the timing, a quick dodge works just as well.
Menolias Phase Three
This phase starts following a brief charge similar to when you hit him too many times in the air. At this point he adds the stars back to his rotation, with far more to avoid, a third charged shot, plus the easily punished jump shot also returns.
While there are a lot of things to punish, the best advice I can give is to keep up the rotation you’ve used this far. It won’t be the absolute best damage possible, but it should result in his death instead of getting greedy and losing yourself.
