

Roguelikes can be some of the most demanding and frustrating games to platinum/1,000. The issue isn’t just the skill involved, they typically involve esoteric puzzles, RNG, along with random things to figure out. Bravery and Greed, thankfully, isn’t a challenging game to finish, though there will no doubt be some questions that we’re here to make a lot easier in our Bravery and Greed Trophy/Achievement Guide.
Basic Tips
Every task can be completed with any of the playable characters. Out of the four, I found the Amazon to be the easiest to play. Beyond that, Life is the best path for low-skilled players, with Chaos or Darkness for more competent players. Beyond that, with enough damage and healing, it can feel like dying is impossible.
Can You Save Between Runs?
Well, it’s complicated. There is an option to save and exit, which can be used in non-active rooms. While this can be used to trivialize every trophy/achievement, assuming you’re good enough to beat the boss with whatever build you end up with, it’s not very reliable.
Saving and exiting doesn’t always correlate to where you actually save and exited. For example, one time I tried it by saving immediately after entering the final area, but when I loaded my save I had to defeat the previous boss again. Other times I would wait a bit more, only for it to return me to after the boss was defeated, but before picking up the item that ends the level. For these reasons, I would not rely on it for anything intense. It’s great if you’re like me and needed a specific dwarf to complete the bestiary and wanted to keep loading the final level until it spawned, but terrible if you want to save after every couple of rooms for a Moon Arcanum or all Arcana run. Still, I wanted to be completely upfront about this so anyone who wants to venture down this path has some insight before getting frustrated.
The Log Book
On the title screen there is a book that says Log. This will not only tell you how to unlock a wide variety of things, it will keep track of your progress towards certain trophy/achievements. Make sure to refer to this whenever you’re uncertain, as it will tell you what the game thinks you’ve done, along with giving you an indication of how close you are to being done.
How to Use This Guide
To save everyone’s time, we’re not going to include trophy/achievements we don’t feel anyone will need help with. Killing 500 monsters, casting 20 spells in a single run, freeing 10 prisoners, and so forth should come naturally or make sense the moment you read them. You can also find all the Arcana unlock conditions under Hand of Fate. That said, if you feel like we missed something you think is important, please feel free to comment and we will do our best to help.
Bravery and Greed Trophy/Achievement Guide
I Can Smell Gold
Reach the Dwarven Sky Fortress
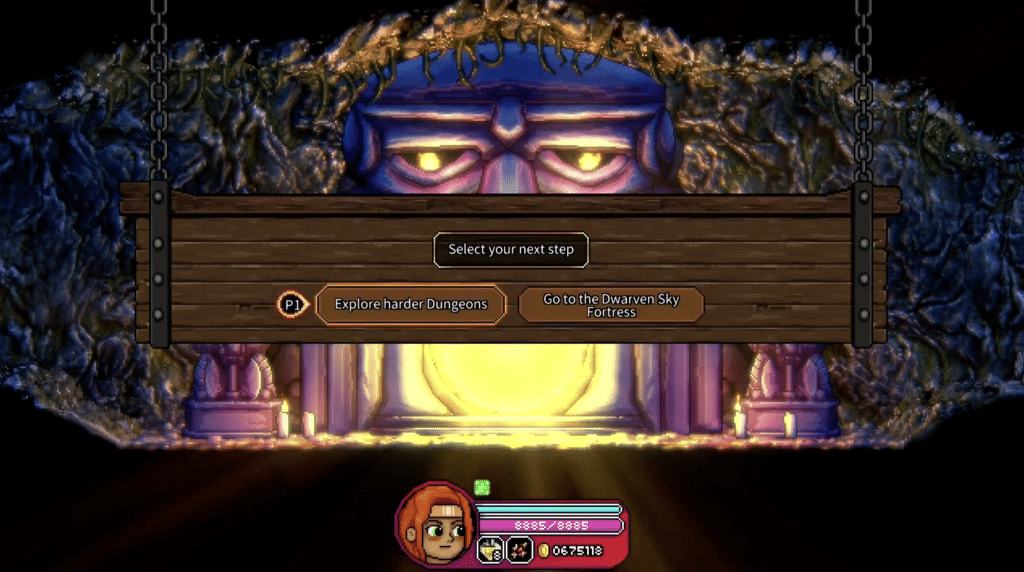
The Dwarven Sky Fortress is the fifth and final level in Bravery and Greed. It’s unlocked by beating the first four levels, followed by a brief introduction stage that will take you there. If you have the Moon Arcanum on, it will offer a harder run of the previous stages or this stages. Finishing this level, regardless of path, will beat the game and give the trophy/achievement Hero.
Dwarves Hold their Grudges
Defeat the Dwarf King
When you finish the Dwarven Sky Fortress there will be two options. For this trophy/achievement you want to select to the Throne Room. This will take you to another area where you need to kill a couple Elite Dwarves, followed by the King.
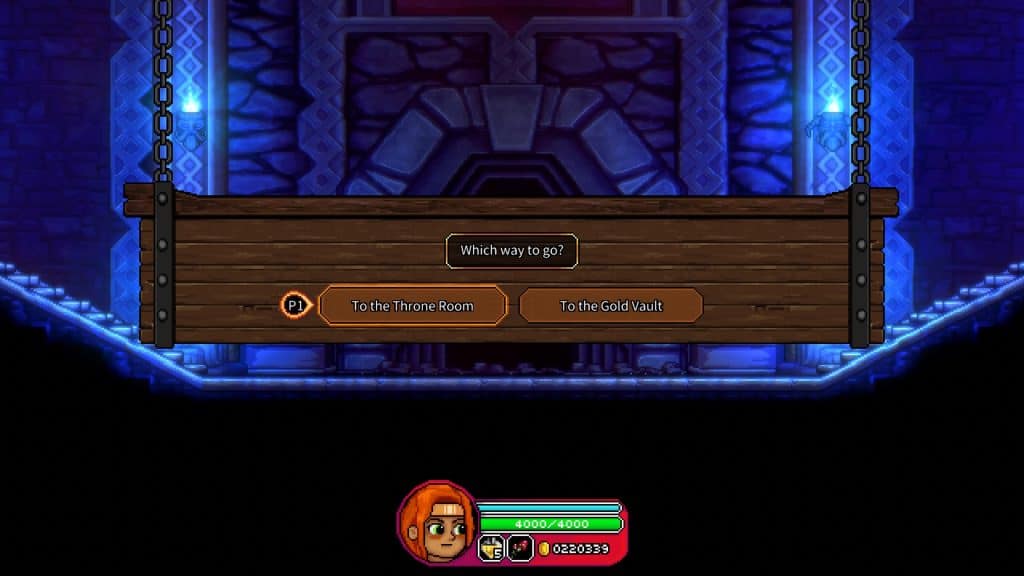
He is an incredibly easy boss that has only a handful of moves. The basic trick is to react and punish his actions. So if you see him winding up his fist, get ready to dodge if he is heading in your direction. When his arm goes forward, there is a devastating fire attack that you can dodge to the other side. Sometimes he will jump for a stomp or do a charging attack and explode. In both cases, just make sure you’re nowhere near him when he does it and you’ll be fine.
Unleash the Beast
Free the Fantastic Creature
When you finish the Dwarven Sky Fortress there will be two options. For this trophy/achievement you want to select to the Gold Vault. Here you’ll just find a dragon, which is arguably the hardest boss in the game.
What makes it hard isn’t a complicated move set, it has among the simplest, it just takes a while and is hard to hit. I found using the range attack away from its fire is the best policy. Beyond that, when you see a blue flame you want to jump towards it as it will create a flame that goes across the screen that slowly rises higher. Defeating it will finish the game and give more gold than the King.
Now That is Something!
Clear the Game with all Arcana activated (The Fool is optional)
This is easily the hardest task in Bravery and Greed, though it isn’t as hard as it seems. While your perks are random, you get to select which path you want to go, and get to pick one of three perks like normal from each of the statues instead of the normal limit of one. Along with this, magic can go either way. Sometimes you’ll get a good spell, with other times it being a bad spell. For this reason I only suggest using it if you want to tempt fate.
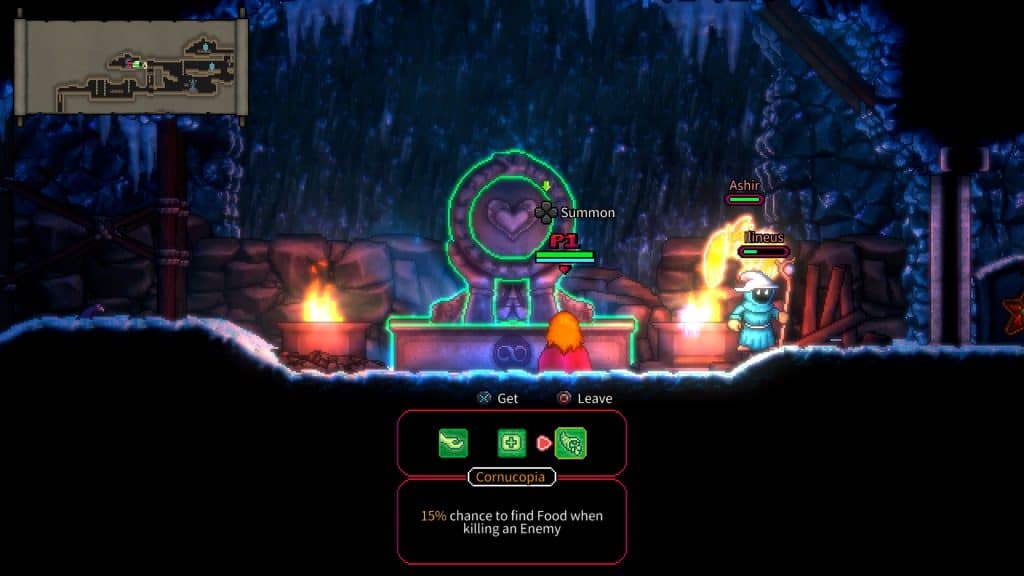
As for the task itself, you basically need to go Darkness or Chaos. Even though Cornucopia from Life is probably the best perk, the Life path makes this task a lot harder than it needs to be. Your goal should be as much damage as possible, since it will help mitigate the negative Arcana. Along with that, I suggest the Amazon since she goes through enemies incredibly fast. Plus, a charged Chakram attack can damage enemies, even if they’re blocking with their shield.
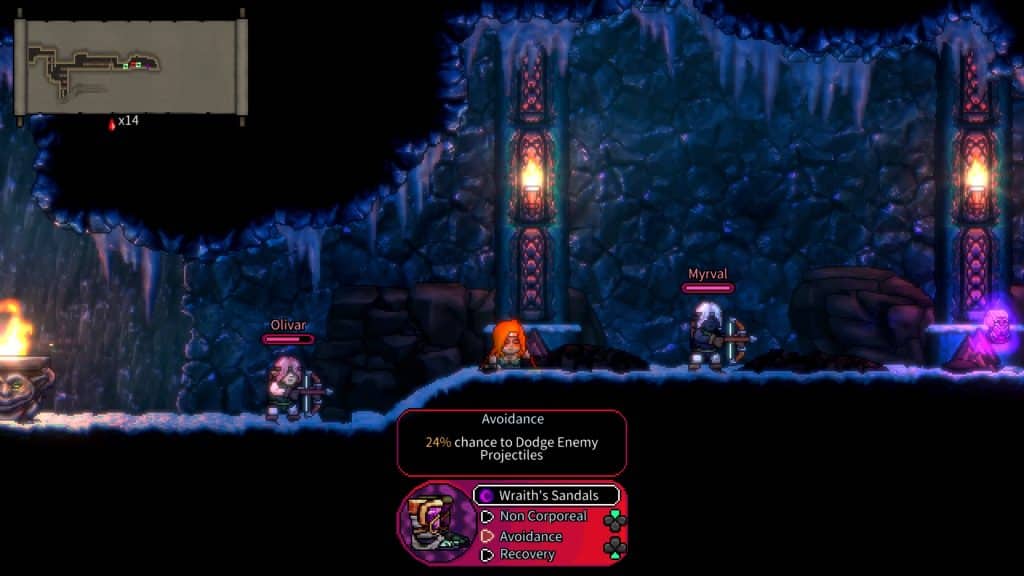
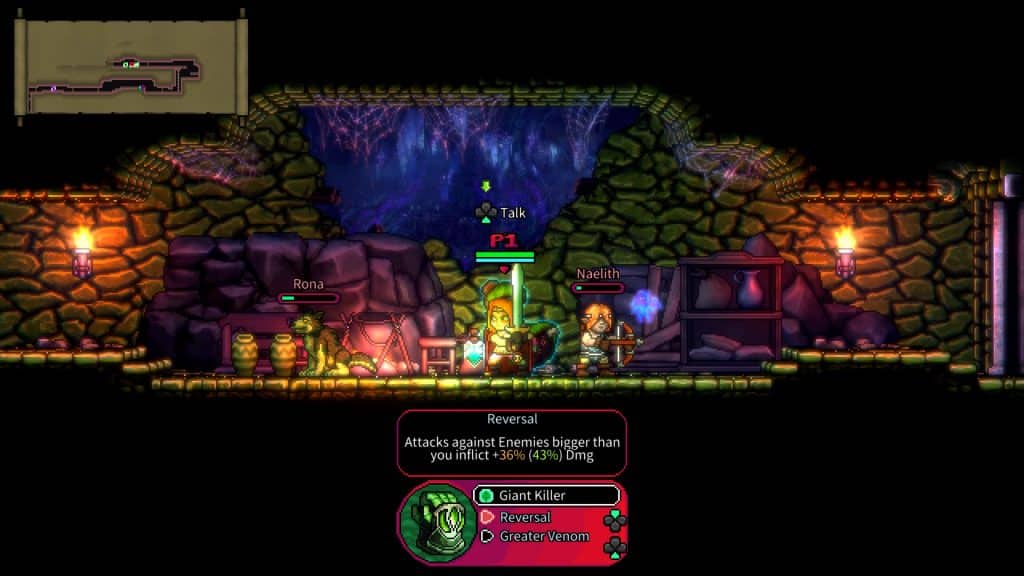
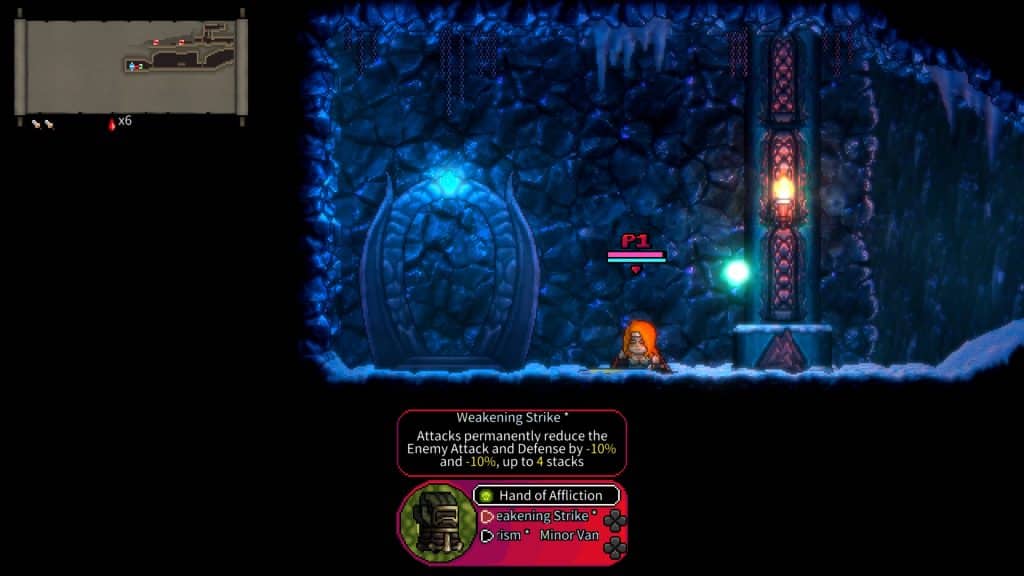
Difficulty will hinge on how well you handle RNG. Beyond this, I can tell you if you Avoidance is the best boot perk in the game. It is found on Wraith’s Sandals, or rarely on other boots, with it giving you the chance to dodge enemy projectiles, though the perk either has the wrong wording or is glitched, as practically every attack could proc it. When you do, you’ll hear some harp cords, see a blue light and take zero damage. It’s a super easy way to get around a sizable number of mistakes. For gloves, you want Reversal for more damage against enemies larger than you, or Weakening Strike to debuff enemies.
I also suggest playing The Necropolis first, followed by The Subterranean Jungle, The Ice Caves, and finally The Magma Pools. This is because the Judgment’s “more vigorous” bosses gives the tree boss, Sylvan’Uur, an additional fairy you need to stop; along with the Beholder boss, Zhur Gor’od, a second orb that bounces around the level. These are far more annoying than the other two being a bit faster, especially since the worm, Hell’s Maw, can only hurt you if its head hits you when it leaps from a wall.
Another extremely important tip is to either avoid followers, or return for them. Due to The Lovers potentially giving your health to them, it won’t take much for their mistakes to increase the chances of RNG finally getting you. This can be mitigated by finishing the level, using the teleport at the end to go back to where they are and free them, though you want to be careful with that as well. Followers can disrupt boss rotations, especially in the case of Frostfang, making it more likely to take damage. This is completely a personal choice, I actually freed them, and regretted it every time, but every run will be different. It also helps to avoid the statue until the end of a run, since they give a buff that can be used to make the boss easier.
If you are struggling, trying some runs with The Sun equipped helps a lot. Exploding corpses did the most damage to me in this run by a wide margin, so knowing how to deal with them helps a lot. Another helpful hint is mice not only explode, their timer is much faster than normal enemies. Thankfully, the same does not seem true for birds, so don’t get attack happy. Another weird one are the priests that summon Zhur Gor’od. They explode after it is summoned. Speaking of which, this is also why you might not want to use magic during this run.
The High Priestess gives you random spells that can go either way. A lot of spells summons helpers, who will also explode when they die. The number of times I would summon leeches, followed by get damaged by them was shockingly high. In general I thought the risk was worth it, though I wouldn’t chance it in situations you can absolutely handle.
Finally, The Chariot can make runs go from good to bad in an instant. While you should have sizable time to clear most rooms, along with this telling you if there will be multiple waves, the smoke skulls slowly grow more aggressive. As more time passes, they will explode more often, eventually going off every second until you win or die. It really shouldn’t be an issue if you have a lot of power, though don’t think you can casually clear rooms and deal with it either.
Full Moon
Use the Moon Arcanum to clear the Game after a full additional loop
For New Moon, Crescent Moon, and Full Moon, you need to finish a second run. This is done by killing the dragon to unlock The Moon, followed by enabling it, going to the last level and selecting harder dungeons.
When it says difficulty six and eight, it actually means stage six and eight, which means you’ll get New Moon halfway through your second run, Crescent Moon before entering the final area, and Full Moon if you manage to beat the game.
As for difficulty, it really isn’t harder as much as more annoying. You’ll see every annoying enemy in excess, with all enemies in larger waves. If you die, it’s going to be because you got overwhelmed, not because enemies are smarter. For this reason I strongly suggest going a path with more sustainability like Life. While doing this it also helps to pick different perks and try to unlock the trophy/achievement Scholar. If you do have issues though, refer back to Now That is Something! and see if those tips help.
Hand of Fate
Unlock all Arcana
Every Arcana is tied to a specific trophy/achievement. While this will unlock over time, you can find the full listing of Arcana and its unlock condition below.
- The Fool – It was Bound to Happen…
- The Magician – Open Minded
- The High Priestess – Archmage
- The Empress – Breaker of Chains
- The Emperor – Dwarves Hold their Grudges…
- The Hierophant – Still Undecided
- The Lovers – Oh No! My Savings!
- The Chariot – Ain’t Nobody Got Time For That
- Justice – Scourge Incarnate
- Hermit – Full-Fledged Explorer
- Wheel of Fortune – Free Will is Overrated
- Strength – Almighty
- The Hanged Man – I Feel Dizzy…
- Death – Close One!
- Temperance – Sobriety Test
- The Devil – The Great Equalizer
- The Tower – Pest Control
- The Star – Spin on This!
- The Moon – Unleash the Beast
- The Sun – Collateral Damage
- Judgement – When Will They Learn?
- The World – Hero
Nice Wardrobe!
Unlock all Gear
To unlock every piece of gear you just need to hit level 57. If you’re unsure what you need or how much is left, you can find all of this information in the Log.
Naturalist
Complete the Bestiary
The Bestiary is pretty annoying, since there are some obtuse things you need to figure out. Thankfully, I believe we figured them all out.
- For slime, there is one for every level (Ice, Magma, Acid, Poison) and they generally appear on the second run. So if you need the Ice Slime, keep doing The Ice Caves as your second level and it should quickly spawn.
- Spitting Venus (plant enemy) and Psilobite (mushroom enemy) only spawn in the boss room with tree boss, Sylvan’Uur. If you don’t accidentally trigger them, you need to let the fairies live long enough to summon enemies. On the top level will be the Psilobite, with Spitting Venus appearing on the bottom. Only one needs to be killed, so worst case mess up a run getting them.
- Dwarven Priests come in all eight different types of magic, and randomly spawn when you enter the final level. If you get down to just one, I suggest saving prior to entering the Dwarven Sky Fortress, making a copy, and constantly trying until it eventually appears. Be warned, some of them come in different colors of the same type.
When you do finally get the new enemy, make sure to finish your run. I didn’t actually get this trophy until I reached the game over screen, so even if you get them, you need to finish the run to get credit.
Master Escapist
Free all types of Prisoners
This is another annoying esoteric trophy/achievement. Basically, prisoners are companions you can save during a run to aid you in battle. Increasing your greed level will unlock new ones, with them all unlocking at level 52. As far as I know, every level will have two of them, though the two you get is mostly random.
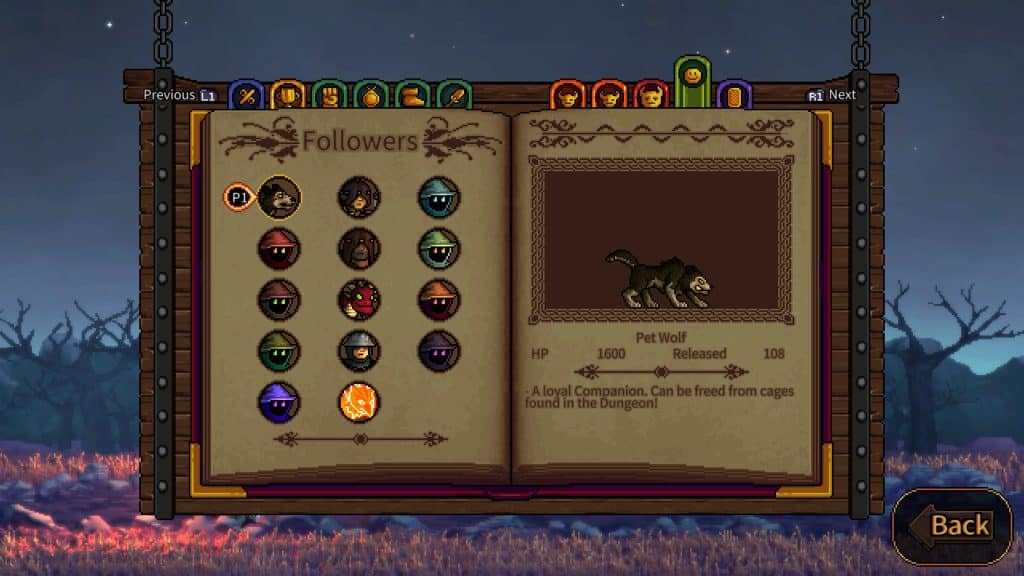
The trick seems to be that every level can have a Pet Wolf, Elven Archer, Barbarian, Drakeling, Spearman, or Phoenix. In addition to those, every level seems to have a pool of that contains two of the eight mages.
The level breakdown for the mages should be as follows:
- The Ice Caves – Ice Mage / Cosmos Mage
- The Subterranean Jungle – Nature Mage / Spirit Mage
- The Necropolis – Decay Mage / Shadow Mage
- The Magma Pools – Fire Mage / Lightning Mage
The trophy/achievement will unlock immediately after freeing the last prisoner.
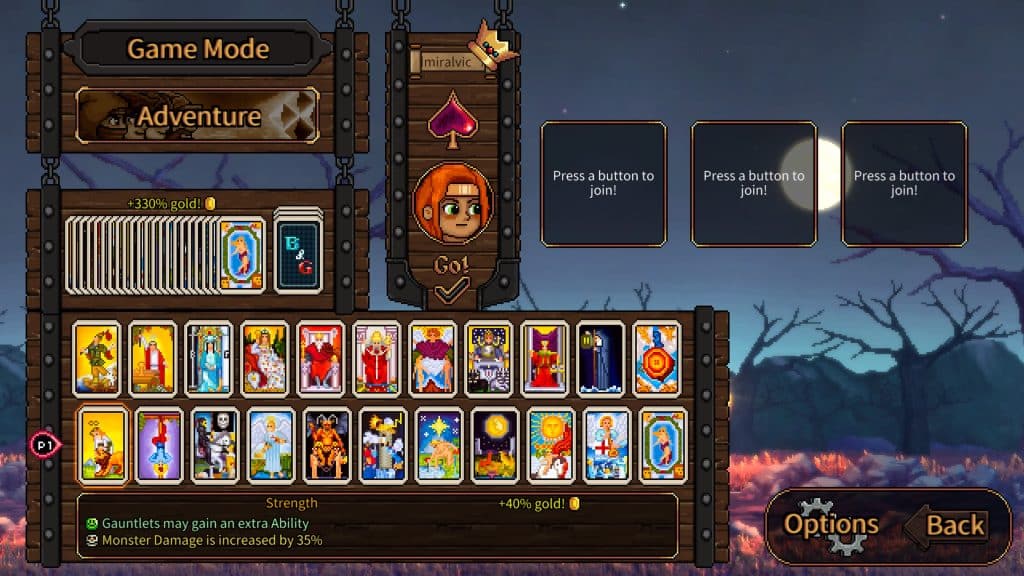
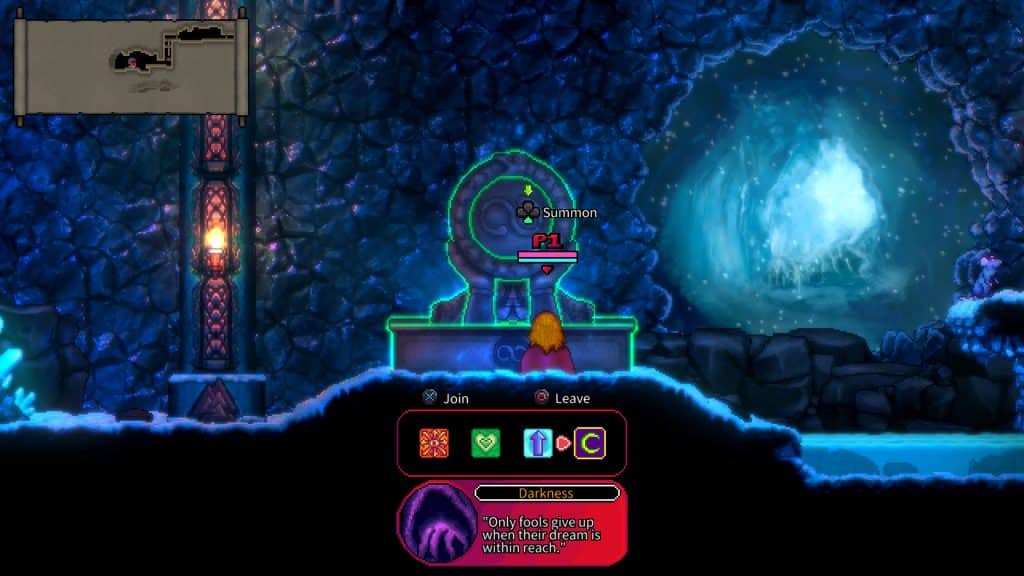
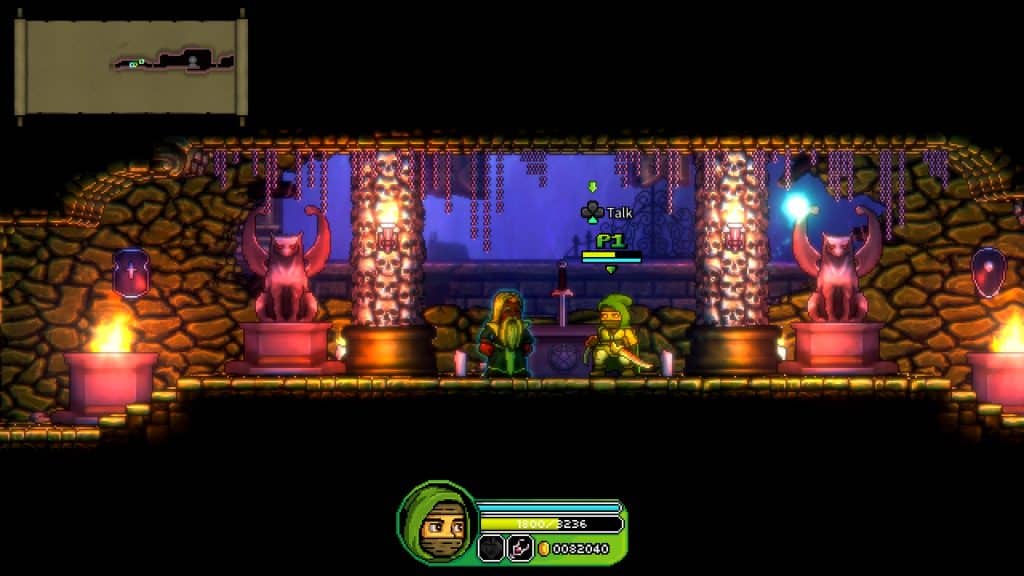
Still Undecided
Clear the 2nd level without choosing a path
As the name suggests, you need to finish two levels without accepting a single perk from an altar. If this is confusing, the image below is when you join a path. As long as you don’t do this and complete two levels, you’ll unlock it.
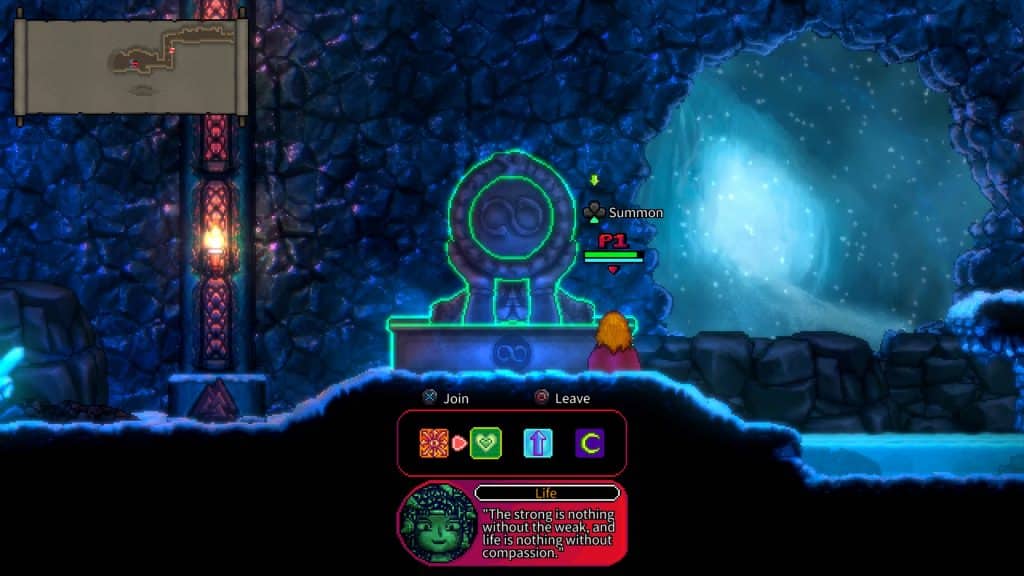
It can be tricky, though once you’re more familiar with Bravery and Greed, and have better unlocks, it shouldn’t be a problem.
The Great Equalizer
Use the Death Arcanum and kill an Enemy with the Reaper
When you use the Death Arcanum it will cause Death to randomly spawn to attack you. This doesn’t seem to follow any pattern, besides it being more common if you stop moving. All you need to do is have it kill an enemy and it will unlock. Odds are this will happen naturally. If you’re trying to trigger it though, kill all but one enemy, get their health extremely low and just let them hit you a lot. Eventually Death will come and kill the enemy before you die.
Ain’t Nobody Got Time For That
Finish a level in under 8 minutes
First and foremost, when it says finishing a level, it means getting to the boss. This makes it a lot more forgiving, though it’s still more luck than anything. Unfortunately, there isn’t much you can do besides clear rooms as fast as possible, always move forward, and don’t spend time getting perks.
Sobriety Test
Hold the maximum number of potions
The cap is six and should come over time. If you do struggle, the Life path has a perk that increases the drop rate.
Nice Posse
Have 3 Followers at the same time
Most, if not all, levels have two prisoners per run. So, to get this trophy/achievement you need some luck. What needs to happen is one of two things. You need to either find the Troglodyte prisoner Garlukk, free him, and have him randomly accept a spot on your team; or find the injured wolf and give it a potion. Doing either of these things with two other freed prisoners will unlock it.
For those struggling to keep them alive, the Life path has some perks that make this a lot easier. Along with that, you can ignore all but the Troglodyte event, and merely return once you know where they all are.
Follow Me if You Want to Stay Alive
Defeat a Boss while keeping a follower alive
This is another luck based trophy/achievement, though you can tip the scales. One of the easiest things is to avoid freeing any prisoner until you’re ready to fight the boss and following the Life path, since it has various perks that increase their damage and survivability.
King Slayer
Use the Emperor Arcanum, clear all the Dwarf rooms and defeat the Dwarf King
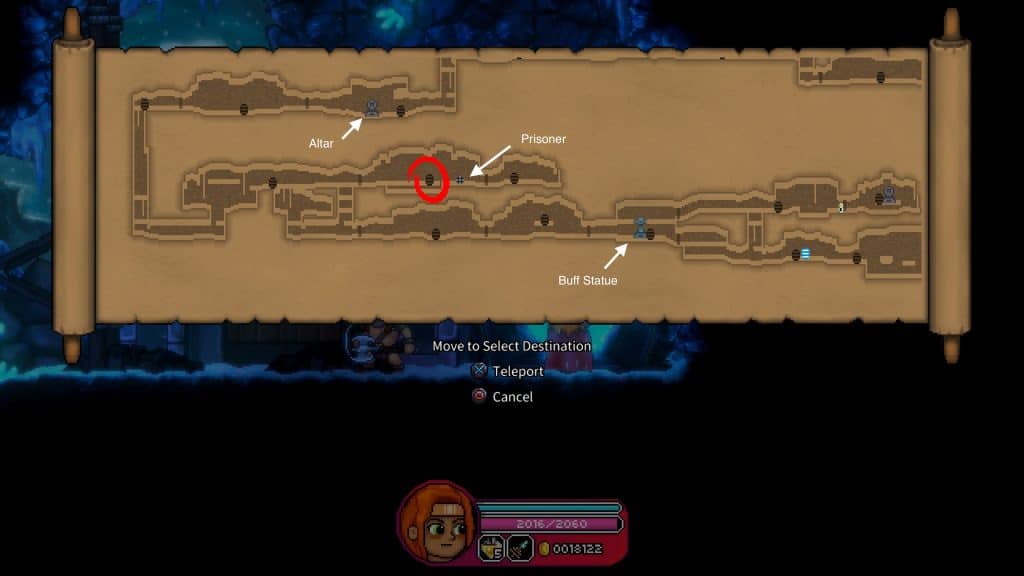
Before you can do this you need to beat Bravery and Greed by killing the King. This will unlock the Emperor Arcanum, which will cause Dwarf rooms to appear on every level.
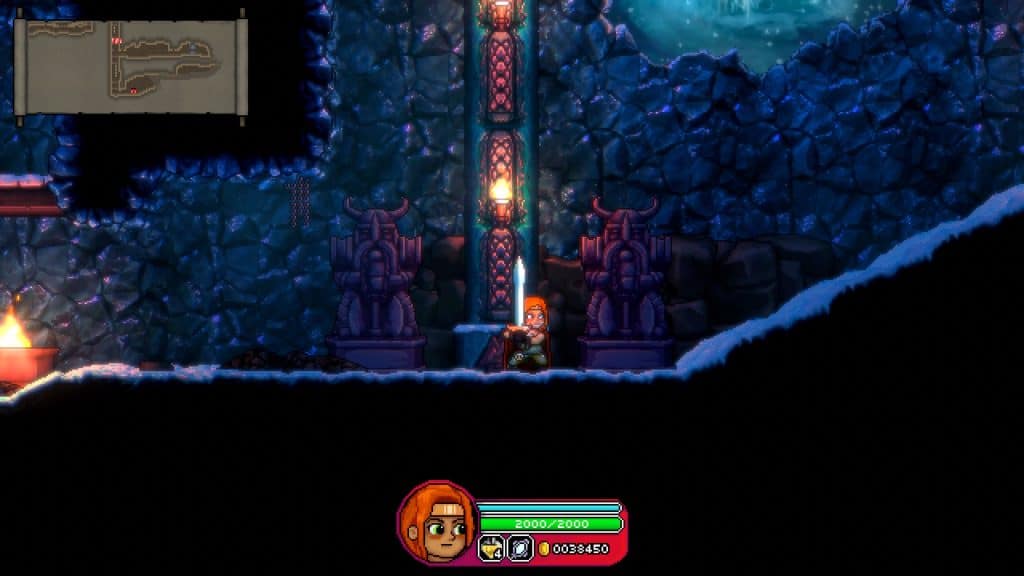
Once it’s enabled, look for paths that have Dwarf statues like pictured above. Every level will have one hidden somewhere, with two waves of Dwarves protecting a teleport and some loot. Once all four are clear, kill the King again and enjoy your trophy/achievement.
Tsunami
Clear wave 30 in Survival Mode
Survival is honestly no different than Adventure. Just, instead of moving to fight enemies, they will spawn in waves. This shouldn’t be too bad, just kill them quickly, open every chest, and try to stay alive. If you are having issues, I suggest either finding someone online to help or constantly restarting until you get a really strong piece of equipment. A powerful wand or useful armor can make a world of difference.
Close One!
Survive a fight with 100 HP or less
Unfortunately, this takes some luck to get, but there is one trick to make it easier. On the Life path there is a perk called Survival Instinct, which automatically uses a potion if a blow is fatal.
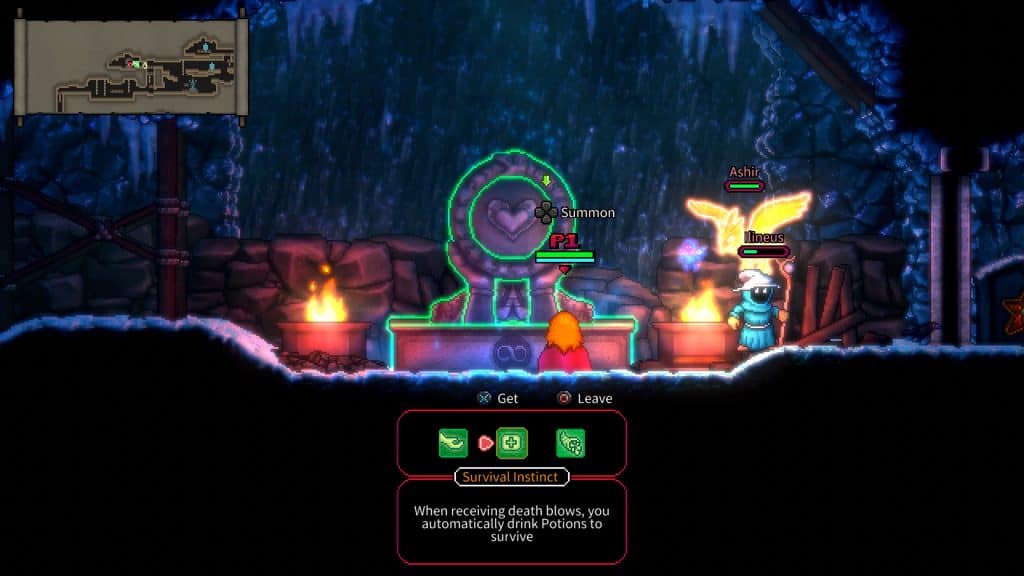
I would allow a boss with practically zero health to constantly damage you until you hit that sweet spot below 100 HP, and then defeat them.
I Feel Dizzy…
Offer a total of 5000 HP to the God of Darkness
This is honestly one of the more confusing trophy/achievements. When you follow the Darkness path there are two perks you need to look for. The first is Blood Pact and the other is Forbidden Knowledge. Both of these perks reduce some amount of health in favor of some kind of bonus.
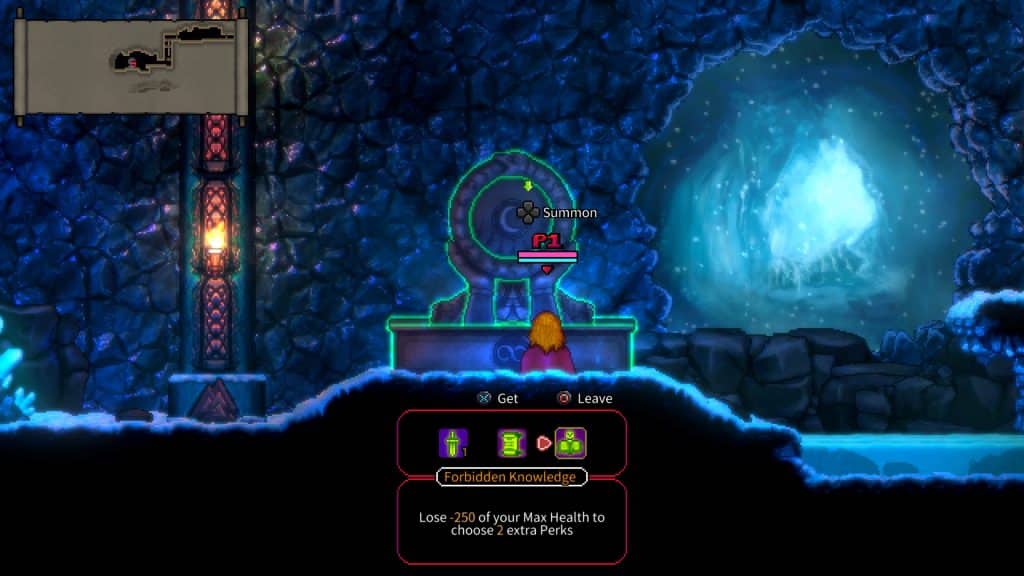
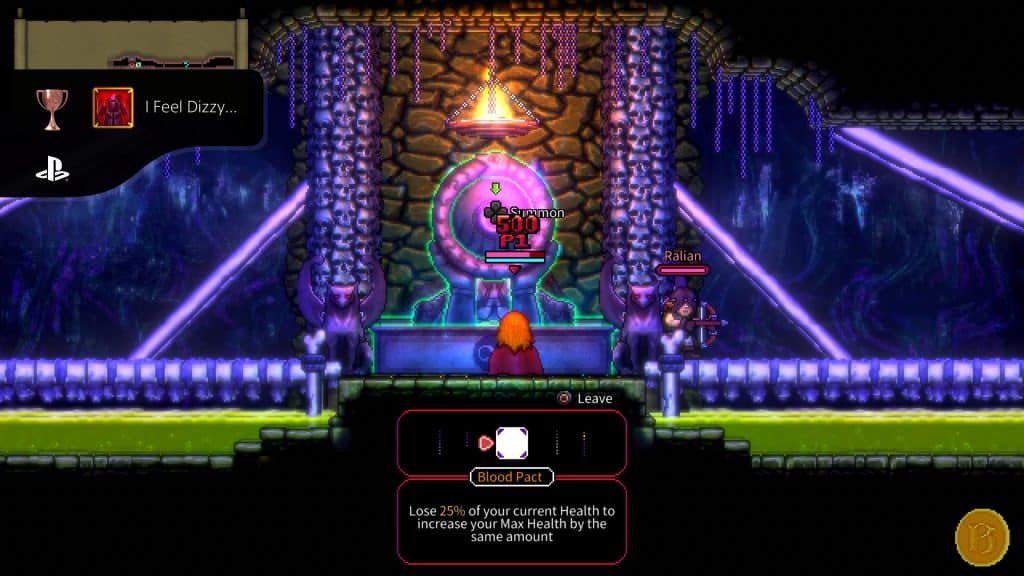
Since this takes roughly 10 runs to hit 5,000, I suggest playing selecting The Necropolis for the extra chance at a perk, and playing until both appear. After that, start a new run to repeat the process until the trophy/achievement unlocks.
Free Will is Overrated
Get both the Lucky Deal and Gift of Chaos perks in a single run
Both Lucky Deal and Gift of Chaos are perks under the Chaos path. To get the trophy/achievement, you need both to appear and choose them when they do.


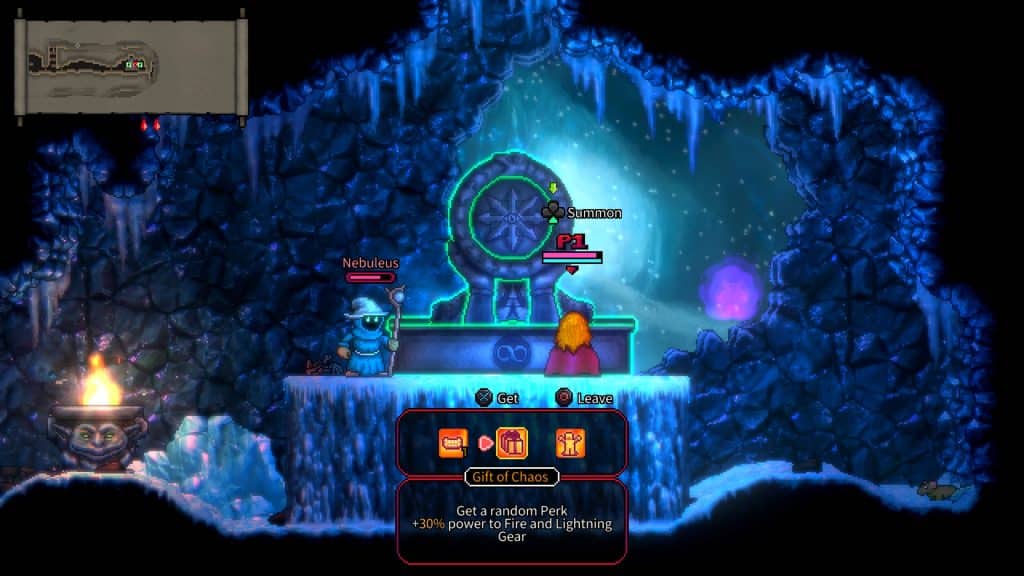
This can be a struggle, but you can increase your chances by always selecting a single tier perk. You’ll know they’re single tier because they won’t have a number at the bottom. Doing this will decrease the perk pool, eventually resulting in both appearing.
Icy Secrets
Find the Altar behind a Locked Door in the Ice Caves
All you need to do is find the key in one of the Ice Caves chests and use that to open the door to use the altar. It could take a while to find it, though you will eventually find it down one of the paths.
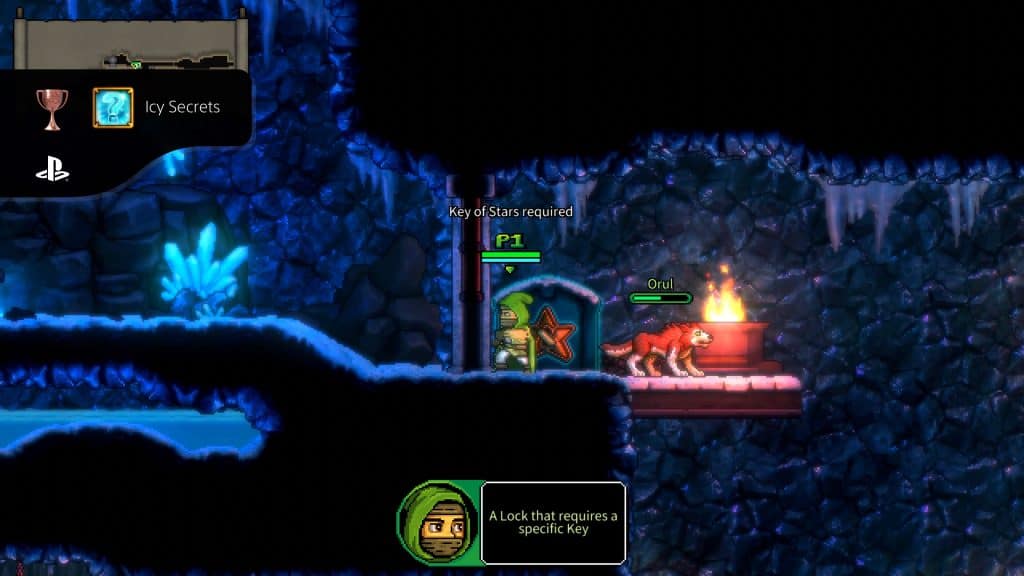
As for the door, it tends to be in a larger room towards the middle, though odds are you’ll pass it while looking for the key.
Cat Hasn’t Got you Tongue
Correctly answer one of the Sphinx’s riddles
After unlocking The Magician Arcana by going down each path once, you’ll gain access to The Sphinx in The Ice Caves. It will be a simple fountain that will ask you a riddle.

Every riddle I encountered was something commonly used as an example, meaning Google will instantly tell you the solution. Though, even if you guessed at it, there are only three options, with most having obvious solutions.
It’s my Lucky Day
Win the Wheel of Fortune Jackpot
To get this you need to first unlock the Wheel of Fortune Arcana. This is done by getting the trophy/achievement Free Will is Overrated. After that, there will be a wheel somewhere in The Magma Pools.
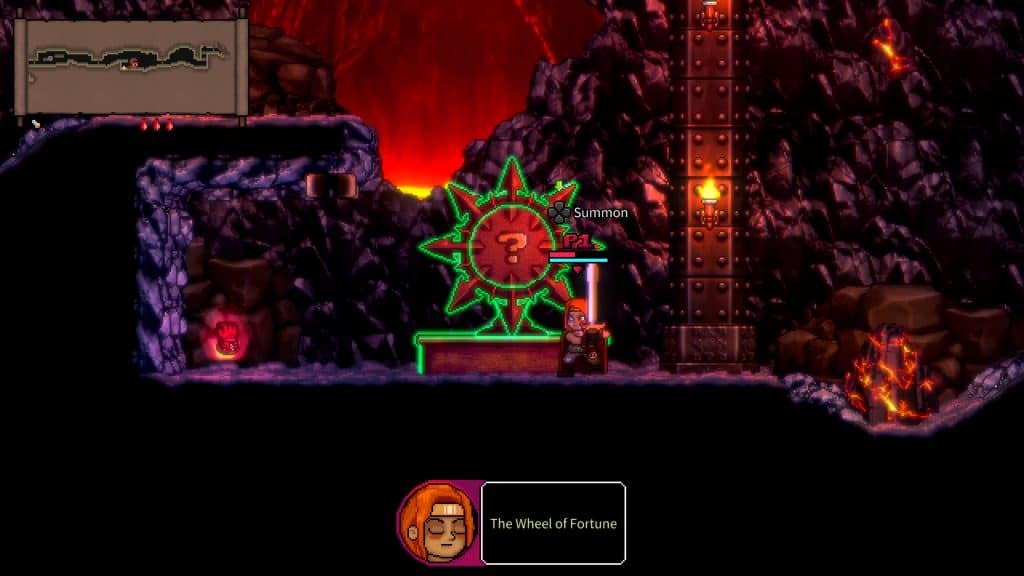
Unlike the other RNG tasks, this one is surprisingly easy. Activating the wheel costs you 2,000 gold, and has three possible outcomes. Skull means you lose, the coin gives 1,000 gold back, with the treasure indicating jackpot. Since you can play an unlimited amount of times, just keep trying until it happens, or you run out of gold.
Fit as a Fiddle
Reach a total of 5000 Max Health
The simplest way to do this is to look for health perks and follow the Life path. Eventually you should find enough to hit 5,000, though if you’re having issues, a Moon run makes it a lot easier to hit insane health numbers.
Oh No! My Savings!
Open a Chest hidden in plain sight
In The Tavern there will be a climbable chain to the far right.
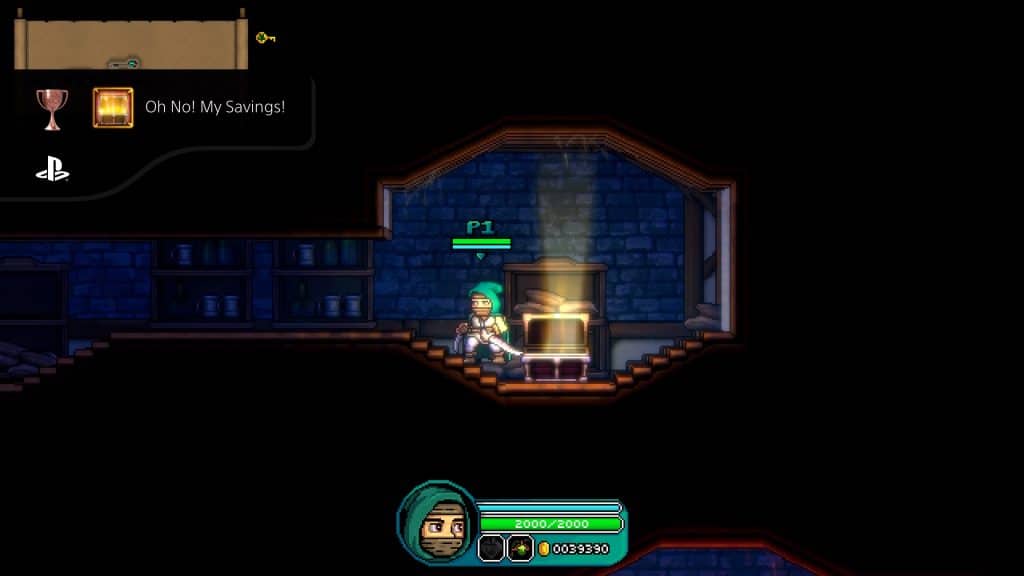
At the top will be a small hallway that ends with the chest pictured above.
Scholar
Get a total of 20 different Perks in a single run
This trophy/achievement is a lot harder than it sounds. Basically, you need 20 different perks on your character at one single moment. Having a three perk glove, amulet, and boot will give up to nine, with the remaining 11 coming from another source.
One way to get additional perks is doing optional tasks. Cursed books potentially give one, the witch gives one, having the Huntsman accept you as a disciple gives one, as does correctly answering The Sphinx’s riddle (The Magician Arcana must be active), selecting luck from The Fountain (The Empress Arcana must be active), and maybe a few more I am forgetting.
For the remaining perks, you’re going to want to select different items from the altar. Leveling a perk won’t help you, though every new one is another step closer to hitting 20. Even with all of this it can be hard to get 20 in a single run, so it doesn’t hurt to use The Moon to do as many cycles as it takes.
For those with less skill, another easy tactic is using The Hierophant Arcana. This has the potential to give multiple skills, though you can offset this by selecting different paths. In addition to that, since you gain access to three additional perks from the statues, it’s a lot easier to hit 20 by the end of your run.
Merlin? Is that You?
Enchant and item to level 50
Randomly you’ll find a bearded man that will enchant an item for a fee. Accept it and this will give the trophy/achievement Charmed! After that, keep playing and eventually you should unlock this through normal play. There isn’t anything special, you don’t need to pay for multiple unlock, just play the game with an enchantment and eventually it will unlock.
