
Games like Labyrinth of Galleria: The Moon Society can be hard to get into. Not only are they long, there are often esoteric elements that rely on players figuring it out to proceed. One such element is leveling, which is extremely important at every point in your play through. Given the importance of this, we wanted to list the best places to level in Labyrinth of Galleria: The Moon Society.
Editor’s Note: Due to the nature of this guide, there will be some slight spoilers. We tried to include as few as possible, but unfortunately some are needed for clarity’s sake.
General Information
Best Facet, Nature, Stat Growth, Stance, etc
Unlike a lot of games, these concepts are largely personal preference. I have no doubt there is probably an objective best, but any stat based choice can be corrected, classes changes, and situations will call for different abilities. The only one that seems to matter, and can’t be changed, is lucky number. For more information on this, check the Brigades section. Anyway, what matters more is making full use of Soul Transfer, gear, and other mechanics.
The Importance of Soul Transfer and Soul Clarity
Similar to Disgaea, getting to level 99 is roughly half the battle. Overtime you’ll unlock a new mechanic called Soul Transfer, which might not seem important, but it has a substantial impact on your progression.
Soul Transfer is Labyrinth of Galleria: The Moon Society‘s take on Disgaea’s reincarnation. Every time you transfer a soul it will increase in clarity, resulting in better overall stat growth. The initial limit is 99, with the Anima Clarity Limit Break Witch Petition eventually increasing it to 999.
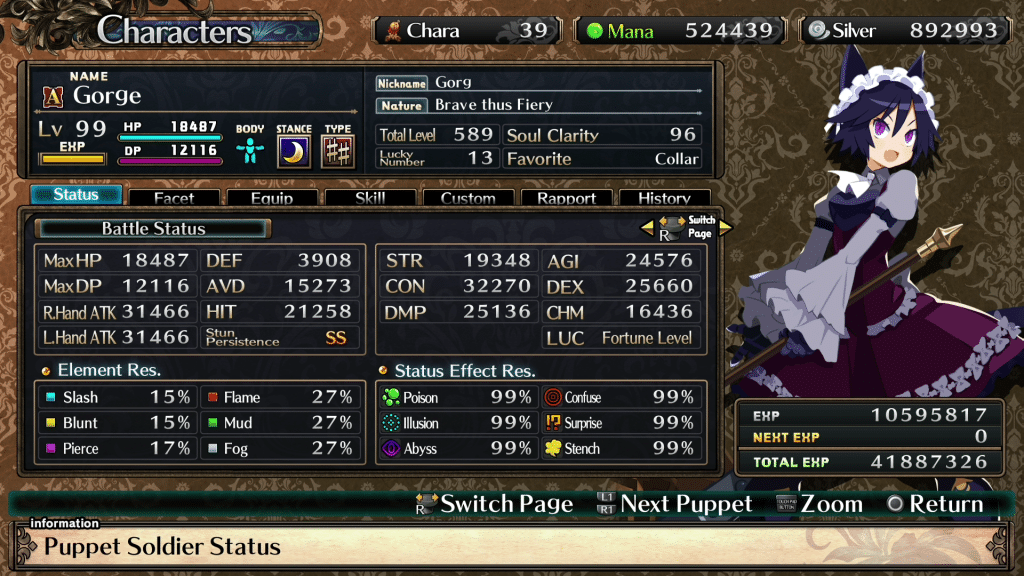
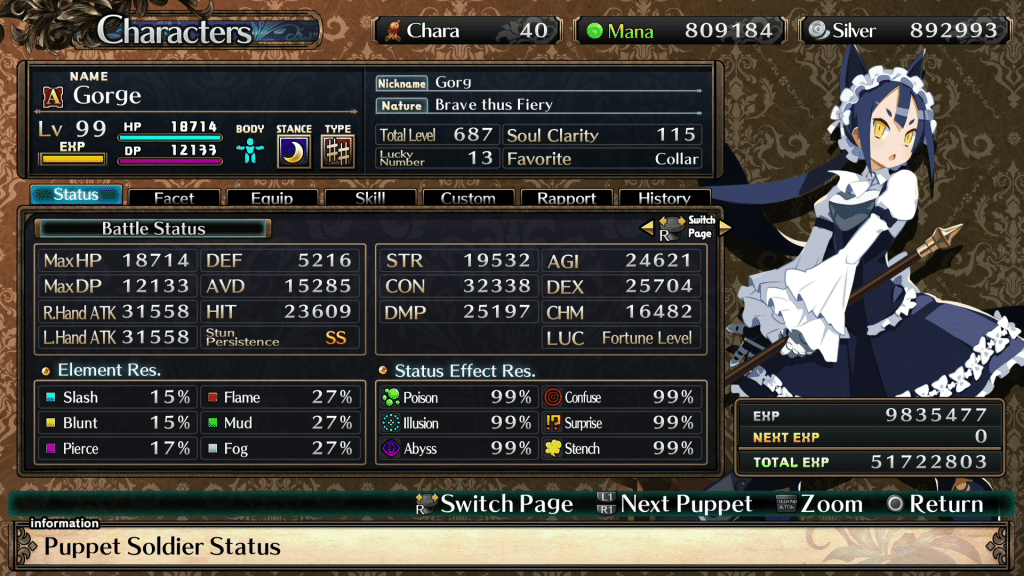
In the images above I basically recreated my character to see how her stats improved. While the gain was relatively modest, outside of defense, the important thing to do is cycle through every facet.
Every cycle gives additional skill points, along with each new facet unlocking a wide array of additional skills. For example, Shino types have two skills called Monkey Scream, and Monkey Mince, along with Rapid types having another called Sex Appeal. All three of these skills make it more likely for an enemy to target you, making them ideal for your tank. Given the tank facet, Fortress, is Peer type, you’ll want to obtain those skills to improve their performance. So while the 2,500 additional HIT I gained is great, I can gain another 8,000 HIT by just using the Prima skill, Approximation Art.
Finally, if you’re ever unsure which skills you need, the character status page has a full history of transfers. It’s a great resource to help you save time.
Pay Attention to Brigades
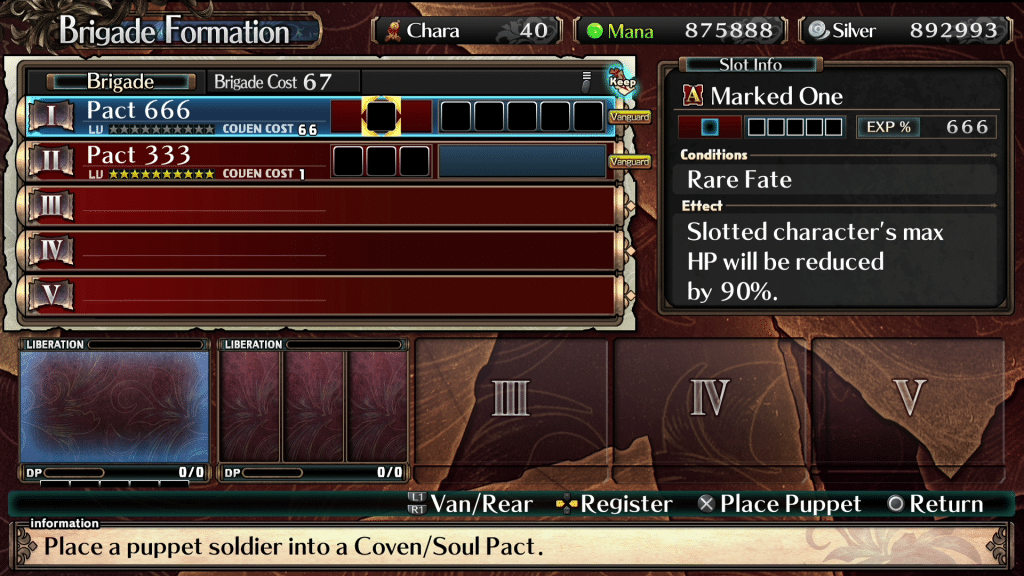
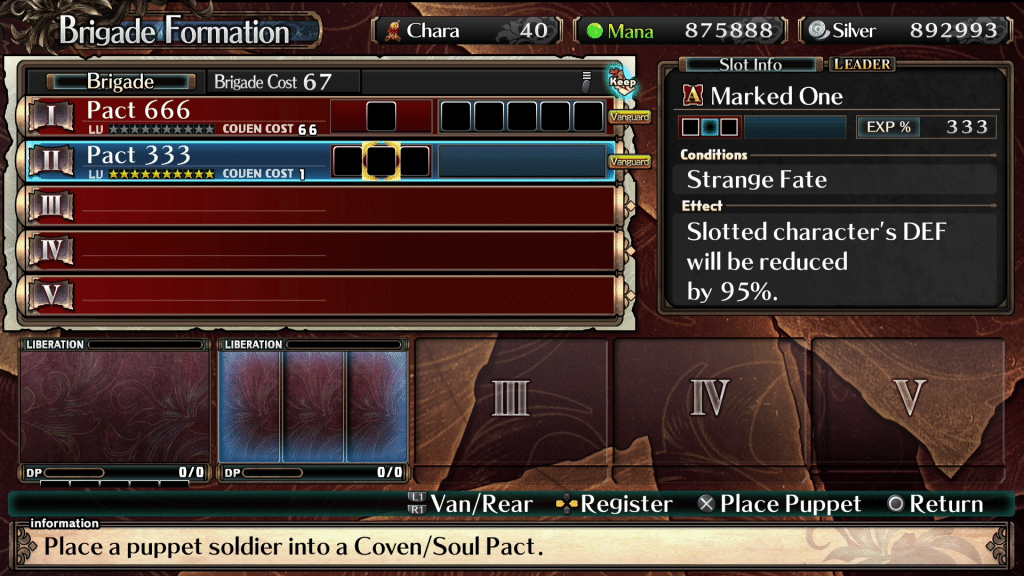
While your first instinct might be to pick whichever has the most slots, they all award different amounts of experience to each position. Most early game options will be relatively similar, with the final dungeon having two notable brigades. One is called Pact 666, and the other is Pact 333, both of which are pictured above. The condition to use one of those slots is having either an even (Pact 666) or odd (Pact 333) lucky number, so selecting that number can make a big difference in progression. Finally, while it’s probably just RNG, grinding the last dungeon resulted in me getting seven Pact 666, but only one Pact 333.
The Best Places to Level in Labyrinth of Galleria: The Moon Society
Character Experience
Early Game – Apse (Floor 7)
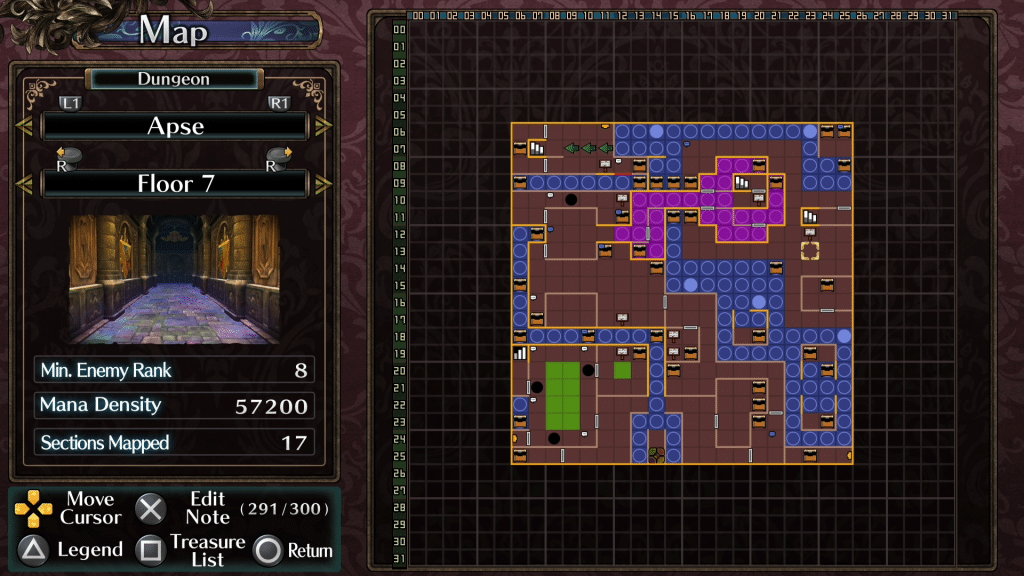
Around 23:12 of Apse’s seventh floor is great for leveling. Most enemies are pretty easy to kill, there is an accessible exit, and it has the potential to spawn Little Bittern, a type of non-hostile enemies that give 8,000 experience a kill.
New Game – Apartment (96F)
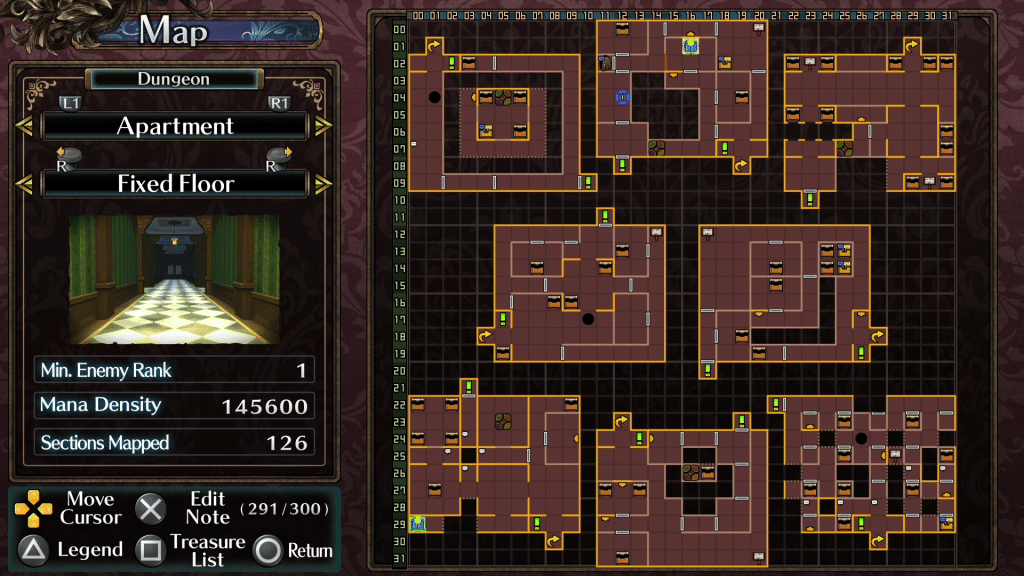
In general, the apartment is a great place to level. It’s designed to go fast, resulting in a lot of enemies giving a disproportionate amount of experience. What is nice about 96F is the Wardrobe. You can leave at any time, and you can always start there if you need some levels. Just keep in mind enemies stop spawning around 27 kills. Even if there is nothing to kill, you can retain your progression by falling down one of the gaps to a lower level.
Mid Game – Galleria Manor (Garden Corridor 3)
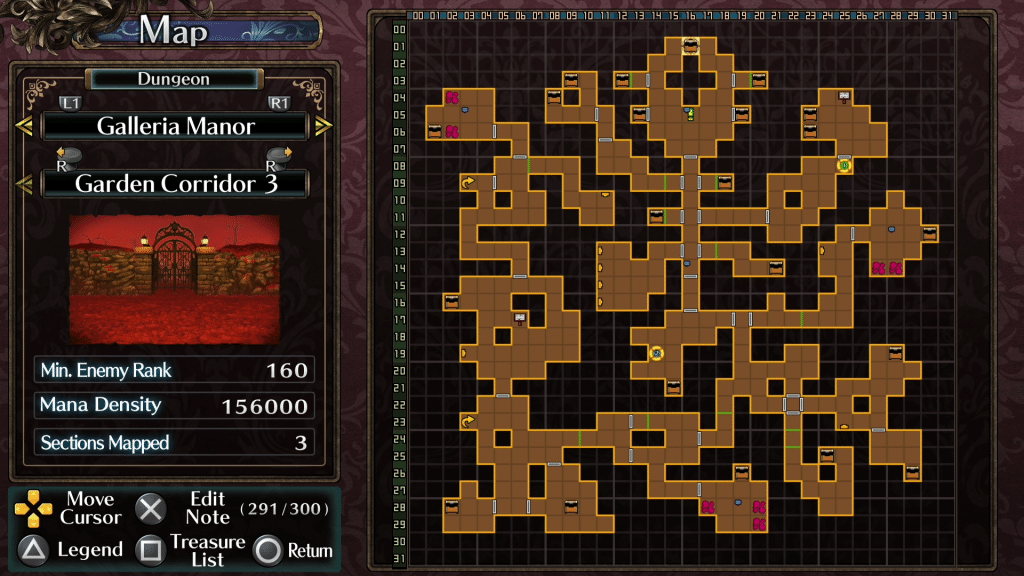
The area around 25:04 is a fantastic place to grind. Not only does is lack all the annoying enemies in this area, if you install a warp point like pictured above, you can also farm the house on Garden Corridor 2 for treasure, before going back to fight a new crop of enemies. Just keep in mind there is a chance enemies will use the warp, but it’s well worth the risk.
End Game – Grand Corridor (Floor 1)
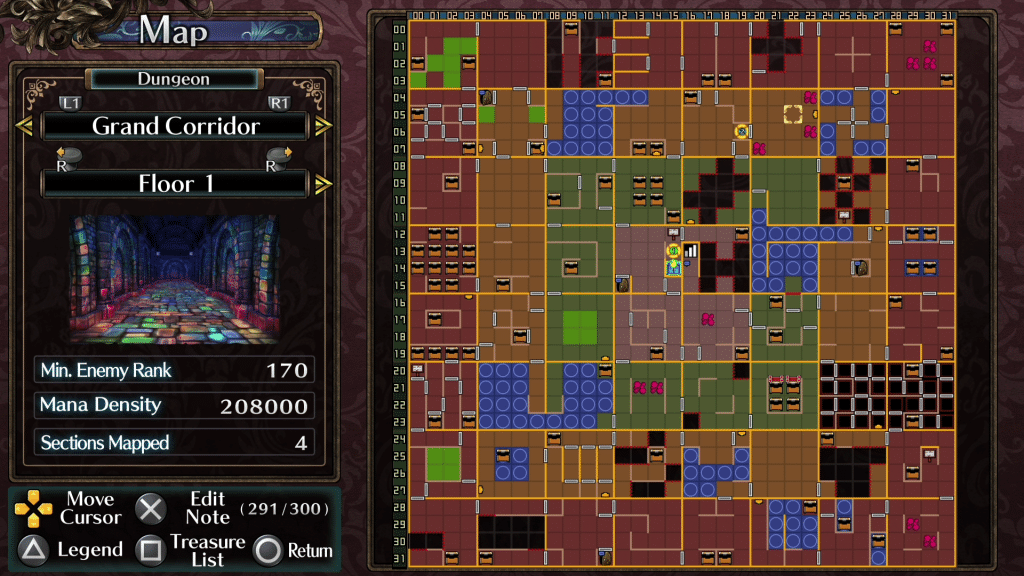
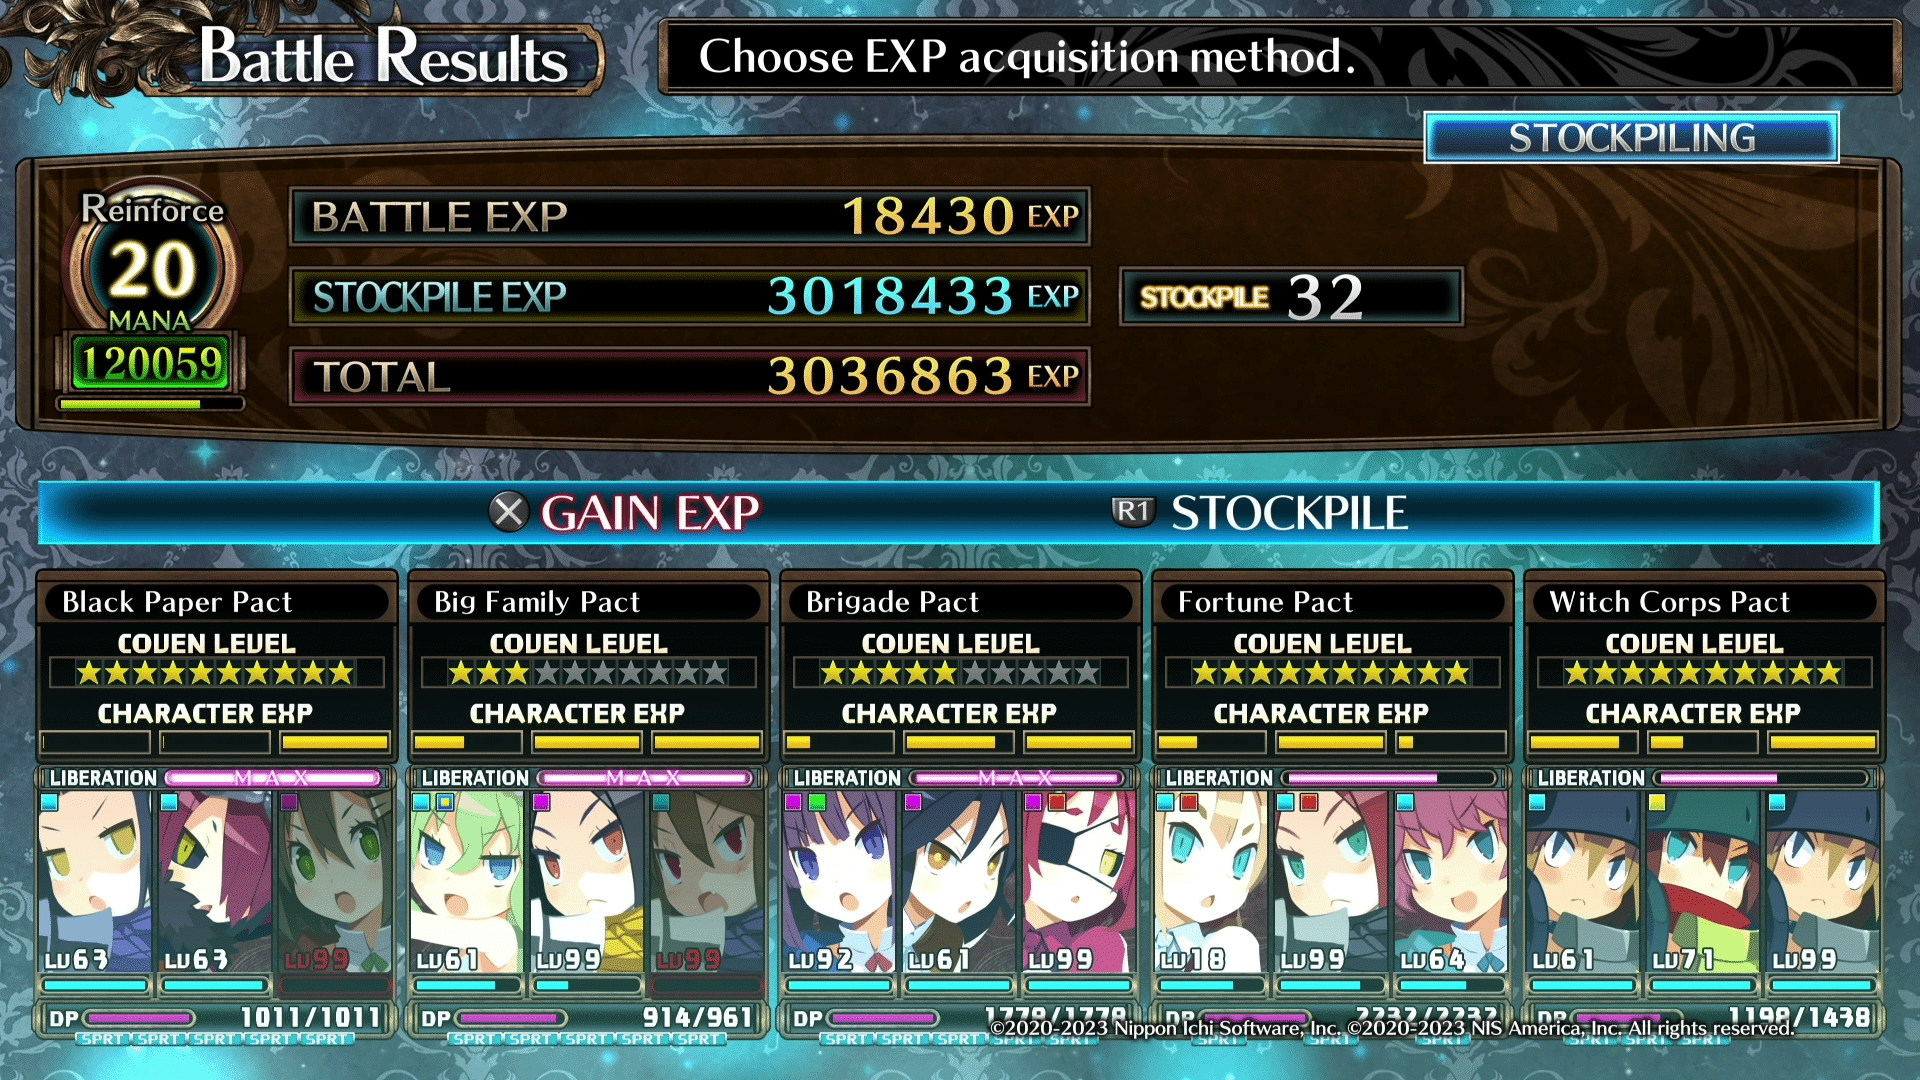
The best spot to level is the 22:05 room on Grand Corridor’s first floor. Not only are the enemies weak, they’re bunched up, making it extremely easy to get successive battles for more experience. Simply clearing the room should yield about 3 million experience in 12 minutes, making it a breeze to level new characters.
Brigade Leveling
As you probably realized, brigades are leveled by defeating enemies. What you might not know is certain symbols give more experience. This is important to know, since you can defeat low level purple/challenge enemies for 15 points instead of the usual one. Beyond that, you can get 75 by defeating Q II (Grim Reaper), making this go even faster.
Best Spot – Narthex (B6)
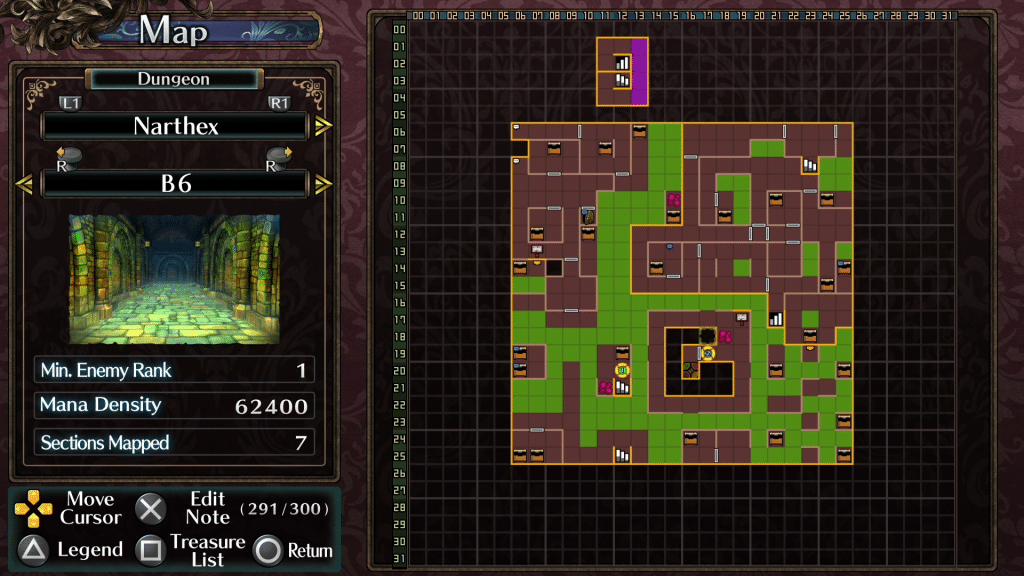
Head to the island with a curio (16:20) on Narthex B6. If you’re having issues getting there, you can actually use the Narthex B5 Wardrobe, and just walk over a ledge.
This location has four purple enemies patrolling the curio, which should pose minimal threat for seasoned players. After two cycles, you should have enough mana to be over on B5, which will spawn Q II enemies. If you can routinely kill them it’s the best place to grind.
Equipment
The fastest way to increase any given stat is to find better gear. Often times the best source are gold chests, as they hold predetermined items meant to aid for that specific point in the story. If this still isn’t enough, there are a few tactics to earn really powerful gear.
Early Game – Loot Rooms
Throughout your adventure you’ll locate rooms that have a disproportionate amount of loot. One of the first such examples is on B4 Narthex, but every couple of floors generally has one. If you’re struggling, locate the strongest room you can get to, loot it, and then use Mud Exits to constantly loot it.
Mid Game – Apartment
While spoons might not sound like a useful item, using them on the Apartment makes it extremely easy to explore floors and collect loot. Unfortunately, it can be risky, especially since there is no guarantee you’ll find anything, this is still a great tactic if you’re falling behind, and desperate to catch up.
End Game – Grand Cathedral
Like the previous method, using a spoon on Grand Cathedral allows you to collect powerful loot. This is an extremely helpful when you first unlock the dungeon, as I went from weapons in the 2,000 range to having a few in the 20,000 range.
Silver Spoons
Since we suggest using your spoons, it’s only fair to tell you where to farm them. NIS was actually nice enough to make this simple, as the best method of farming them is the aforementioned Grand Corridor (Floor 1) 25:05 room. Getting a character from level one to 99 generally yields about 10, so it offers a good rotation of levels and gear progression. The dungeon itself also has the chance to give them from treasure, so it really is in your best interest to farm it.
