
Unsighted is a surprisingly challenging experience. Simple tasks become increasingly difficult as new mechanics, enemies, and situations arise. As a result, the Forgotten Deity is a great introduction to the more challenging aspects. There are a lot of things going on, small changes make a big difference and things can go south fast. With this in mind, we wanted to help teach players how to defeat the Forgotten Deity in Unsighted.
Just keep in mind, this might take an attempt or two.
How to Defeat the Forgotten Deity in Unsighted
Set Up
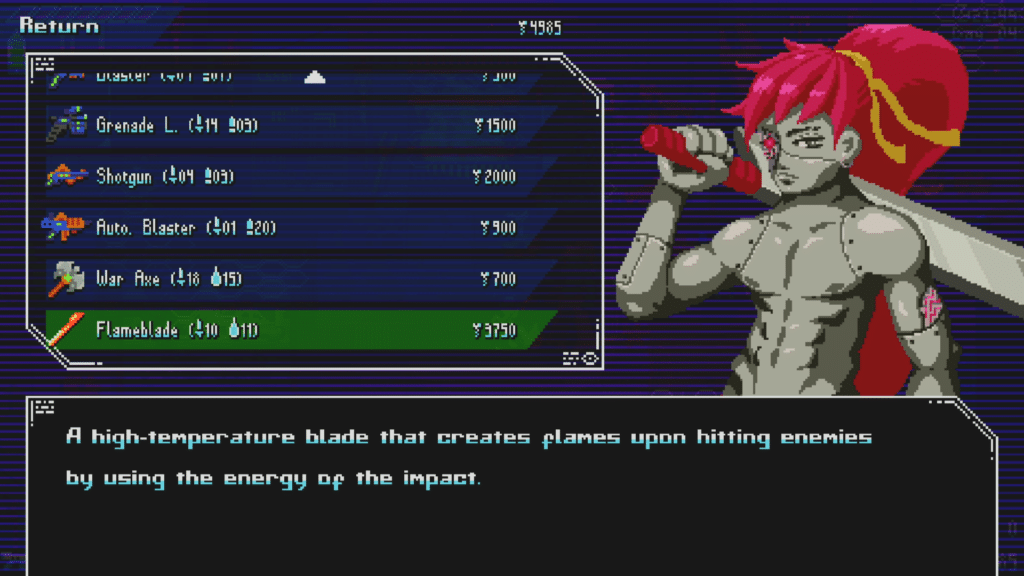
Unfortunately, there is no easy mode for this fight but there are some small changes that can make it easier. One of the simplest is buying the Flameblade from the merchant in Gear Village. It’s around $3,750 and coats your blade in flames. This makes it easier to deal with some of the mechanics before the boss.
Another helpful tip is to change your build. After getting the chip needed to fight the boss, you won’t face any enemies. As a result, I would trade defense for stamina. I took more hits from a lack of stamina over skill. The same goes for your weapons.
If you can spare the funds, Flameblade and Iron Edge is the best combo, otherwise, just stick with Flameblade and maybe a gun.
Finally, don’t forget to use any gears you might have and to collect the revive before fighting the boss. It’s located behind a vine in the area before the boss room.
Getting to the Boss
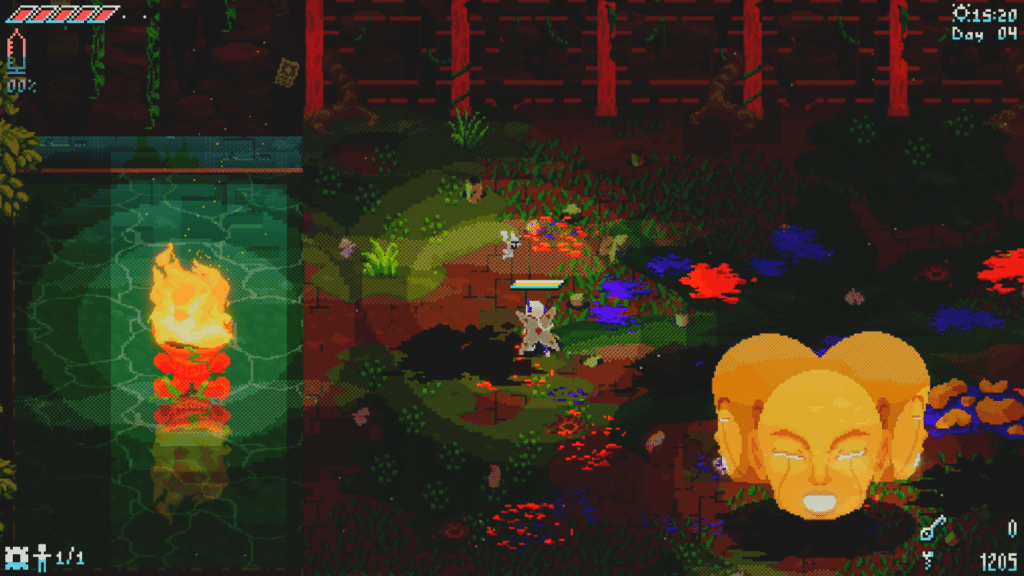
Odds are if you’re reading this guide you’ve already fought the Forgotten Deity and failed. But, in the event you’re struggling to get there, I wanted to explain the Zelda-esque puzzle.
All you need to do is move the flame with the Shuriken to the other lamps. Doing this will eventually open a path and lead to the boss itself. It’s also possible to just strike any lamp with the Flamesword and light it. This allows you to basically skip the annoying lighting section or at least minimize the number of lamps that need to be lit.
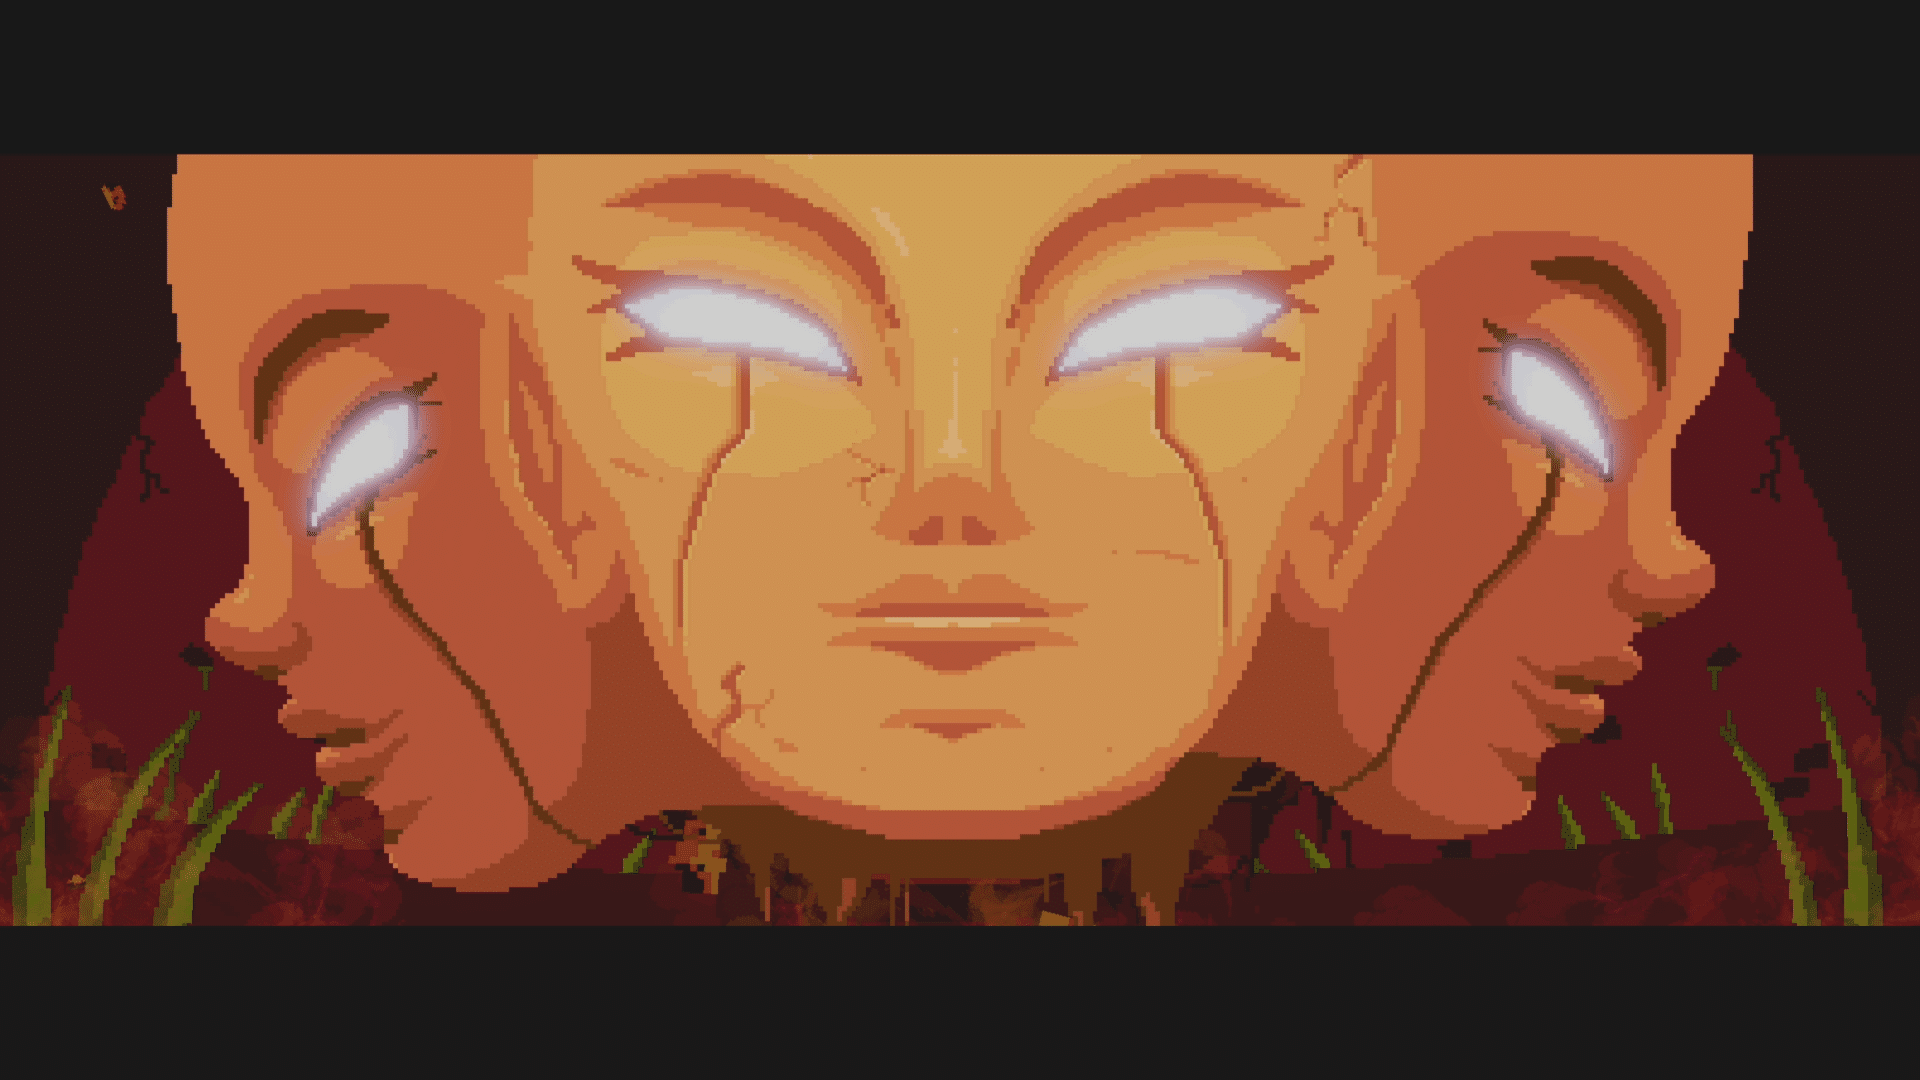
As for the boss, it will be located below a square that has an eye on it. You’ll notice it because it’s, well, huge and there is a lamp at each corner. Lighting all four will open the gate to the boss.
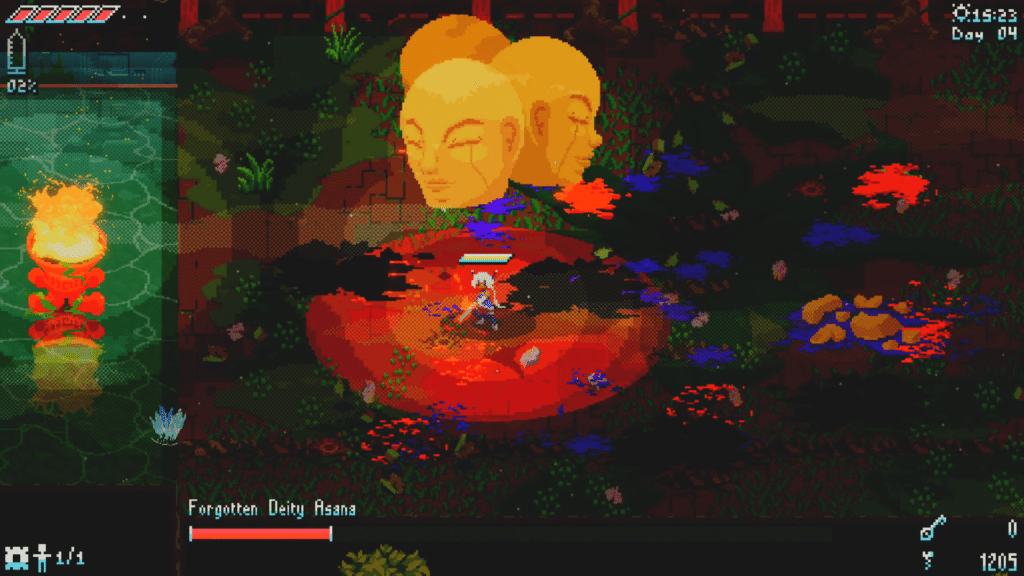
Fighting the Fallen Deity
Phase One
Repeating the flaming Shuriken method or hitting the leaf-coated blob with the Flameblade will start the fight. This will seem like a rather straightforward encounter due to the Fallen Deity’s limited move set.
First, it will spin against a wall, and then either slam the ground three times or summon vines and repeat until enough damage is done. If you can avoid the vines, those are the best time to strike, followed by waiting for the third slam and dodge rolling towards the boss. The timing for the roll is fairly forgiving, though you need to come ready to attack.
If you’re comfortable with parrying, there is a very forgiving chance to stun the Fallen Deity when it rushes you. This is the quickest and easiest way to damage it but it also puts you in harms way.
Phase Two/Three
Around 60 percent and 40 percent health the Fallen Deity will coat itself with leaves again. This is when you want to use the Flameblade to simplify the process. During this part, there will also be two, with it increasing to three on the second attempt, hands that spawn. These do a simplified version of the Fallen Deity’s move set.
Hitting them with the gun can disrupt their attack, which is the only use for it during this fight, and they should be your target the second they spawn.
Phase Four
After killing the Fallen Deity it will split and now you need to defeat each head. This fight continues with the simplified move set, meaning it will bounce off fewer walls and only slam once. The best advice I can give is to either bunch them up or play as defensively as possible.
Phase Five
When one of the heads dies, another one will spawn two more hands. Repeat the previous tactics, focusing on the hands first, to win the fight.
Post Fight
Following the fight, you’ll be teleported to a weird place that is just a hexagon. This can seem confusing, which is why I am including it, but you just need to walk against the edge to find the right path to the exit. It’s not possible to walk over the edge or lose, so just go north to finish your quest.
