
After beating Tiny Tina’s Wonderlands you’ll unlock a new mode called Chaos. It replaces Borderlands 3‘s Mayhem mode as the best way to grind for loot. At first it seems simple, though there is more to it than meets the eye. To help you overcome this fearsome mode, we wrote down all the things we wish we knew before starting.
Tiny Tina’s Wonderlands Chaos Mode Guide
Set Up
While the prospect of starting this mode early is tempting, you’re actually better off finishing all the campaign stuff. The more lucky dice and modifiers you find, the easier and quicker things will go in this mode. It also helps to unlock Myth Ranks and slowly build out your character.
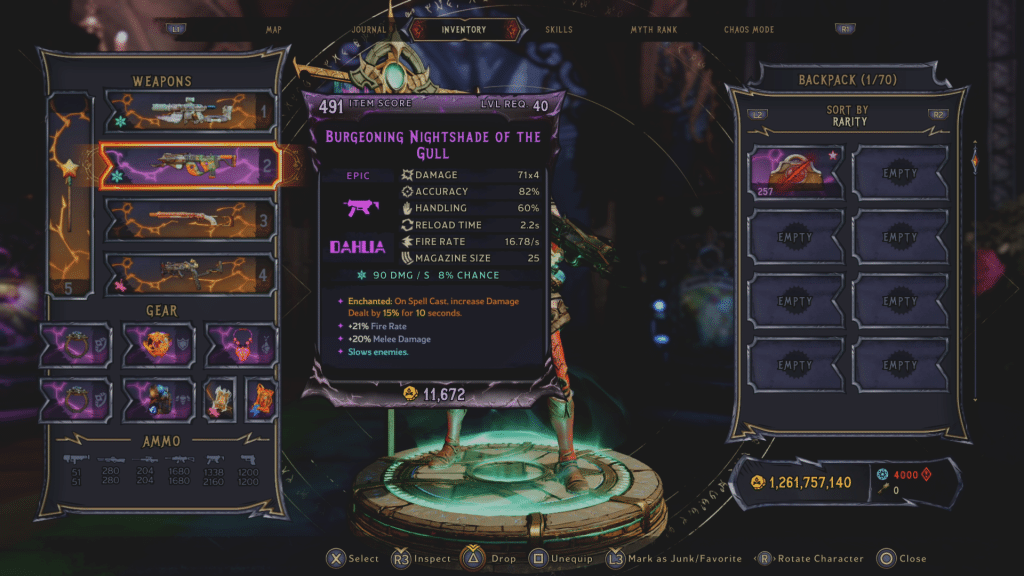
My advice going into this mode is to locate an SMG like the one pictured above. They’re a fairly rare item that can easily be identified by the x4 in the damage category. If you get one that has it, you’re golden. This being said, never stop looking for a better one either. I’ve found some with longer reload times or other quirks, so keep that in mind.
I also suggest getting all your capacity mods or at least finish SMG. Having thousands of bullets will make it far easier to dominate stages than trying to make a handful of bullets work.
Since this is the main weapon you’ll be using, gear that boosts gun damage, SMG performance and frost damage are best. I also used Twister as my spell, though there are a lot of great options. Another helpful trick is legendary gear can be enchanted, even if it doesn’t drop with an enchantment, as can the Chaos mode exclusive gear.
Finally, since difficulty does not influence drops, I suggest dropping it to easy to progress in rank faster. In the event you want to really challenge yourself, you can do that at the max level and get the best possible loot for your time.
Basic Information
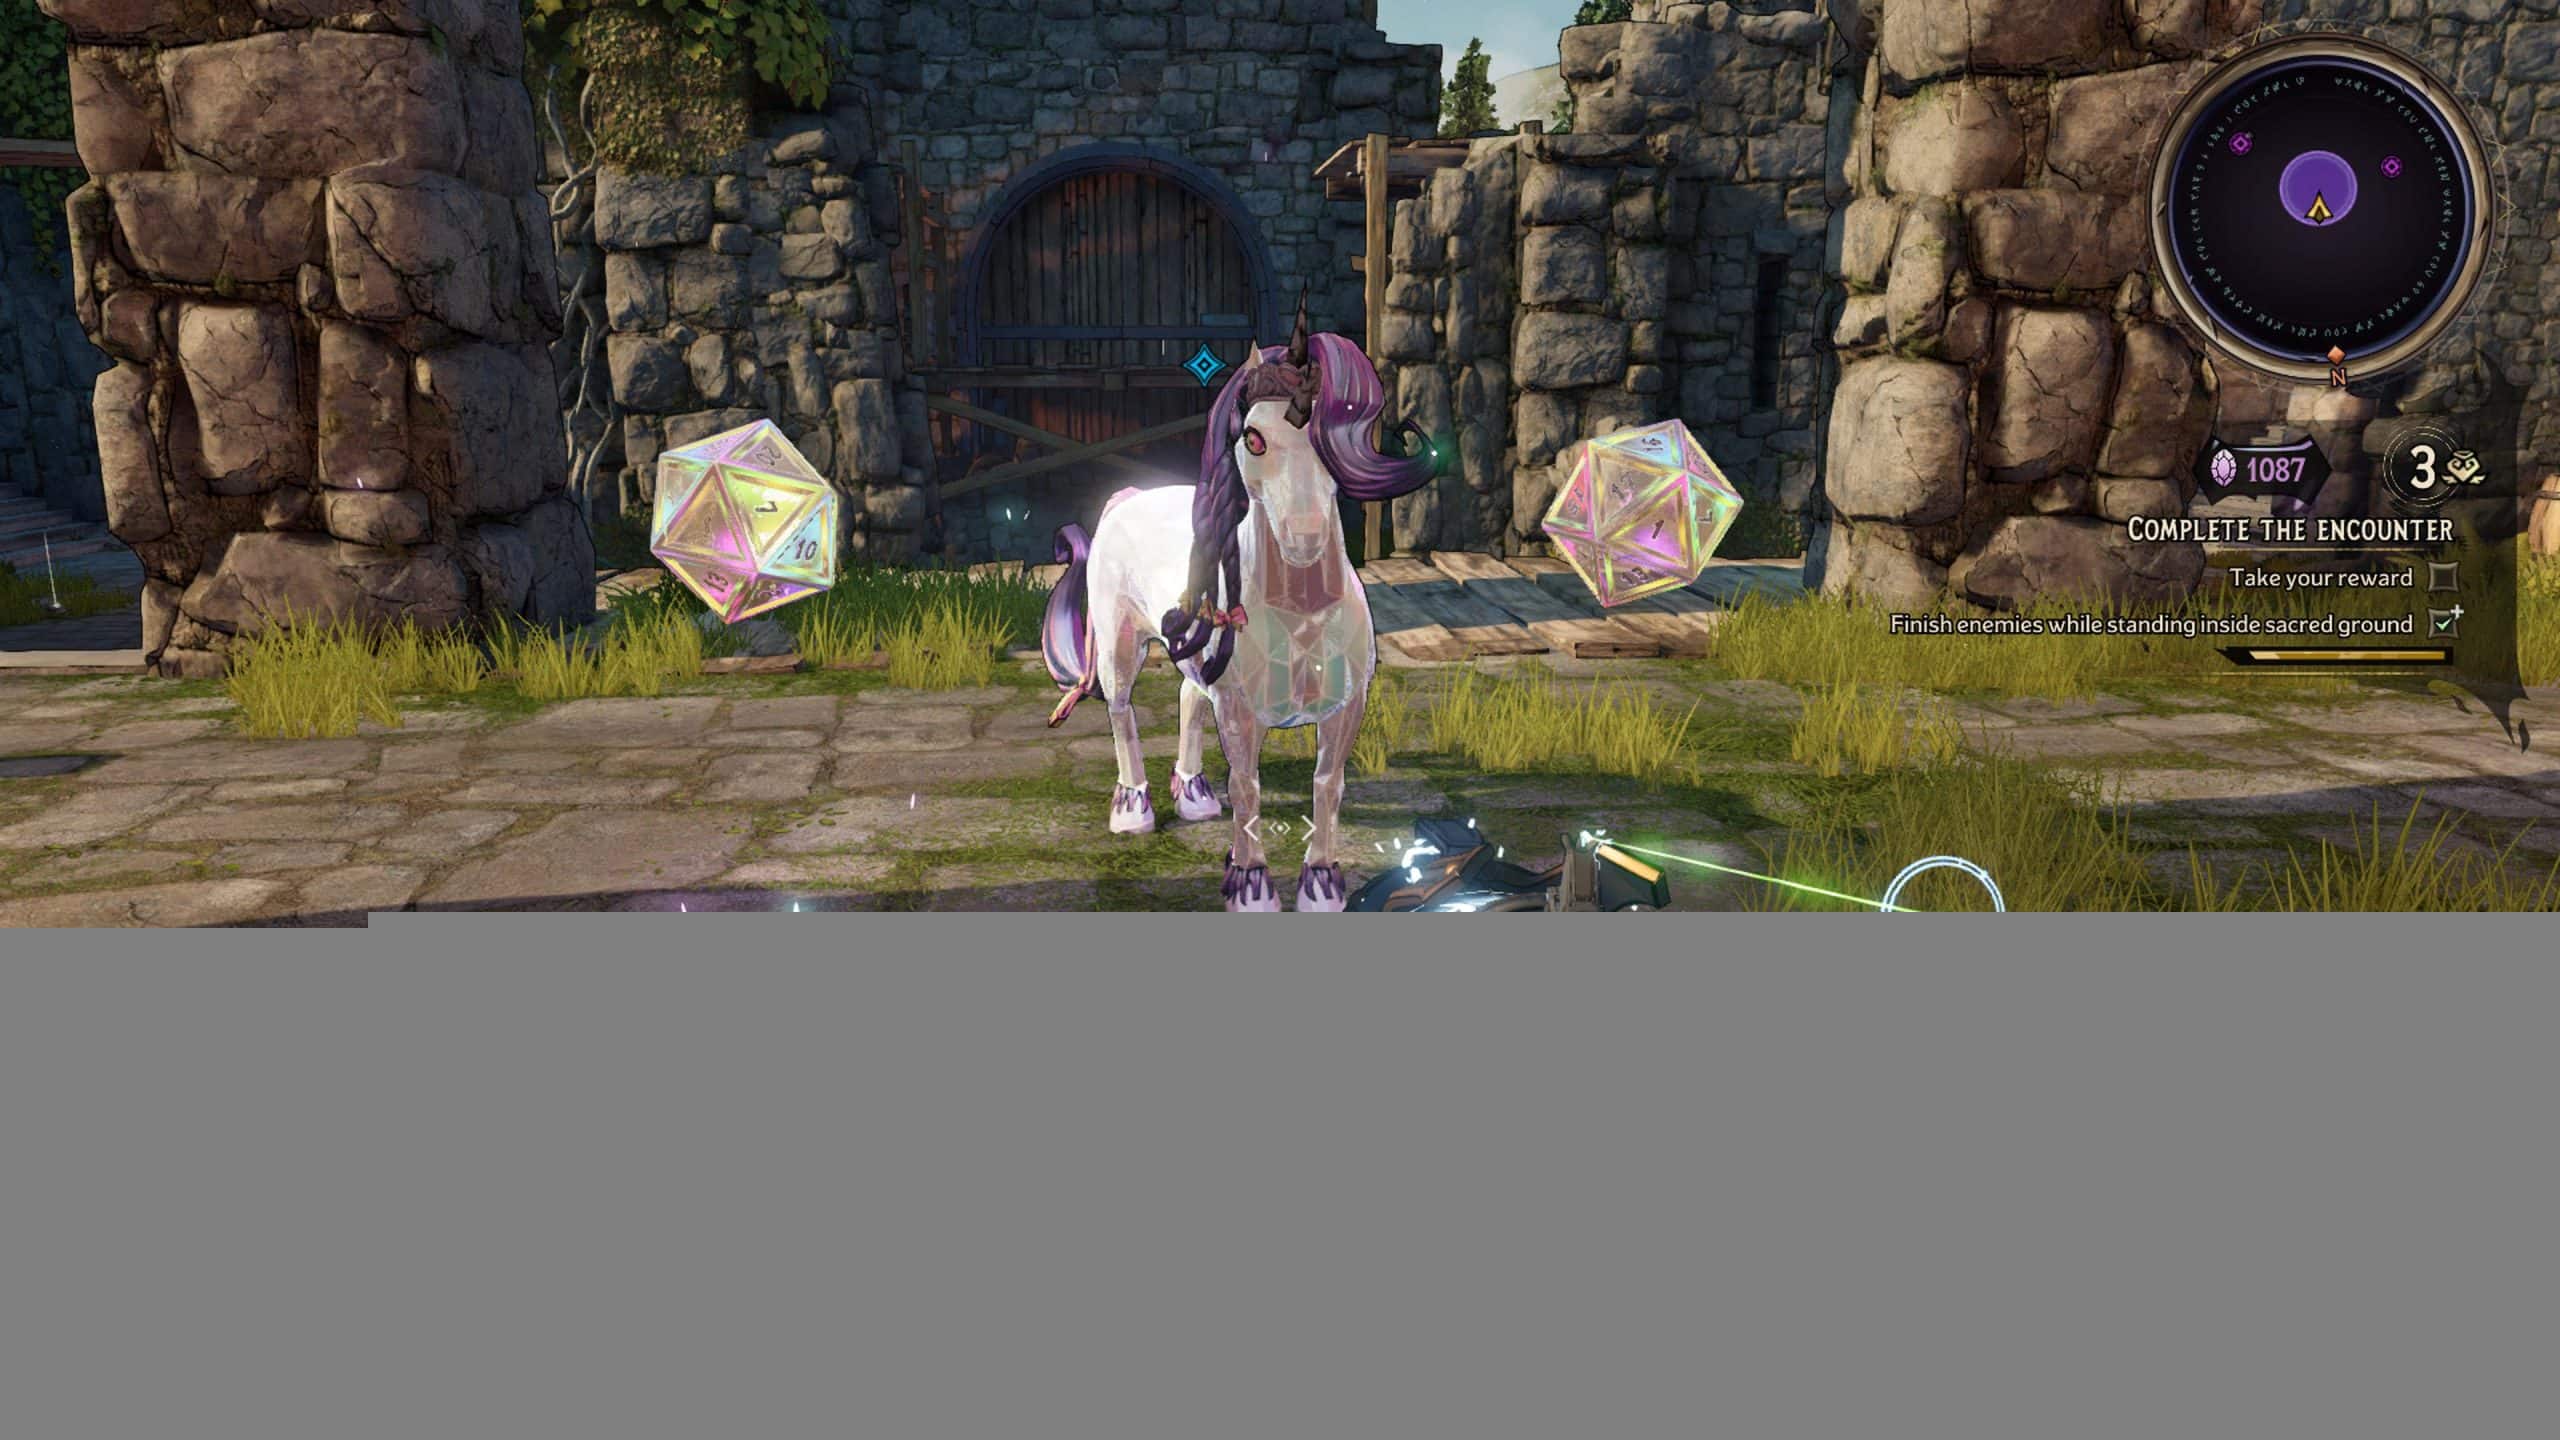
For the most part, Chaos mode is just encounters with harder enemies and better loot. There are a couple differences between the two, with the most notable being the modifiers and alternate paths.


After each stage you’ll get one of four rewards, all of which are pictured above. The fancy chest gives additional currency for the mode, the bland looking chest is loot, Butt Stalion is a marginal buff and the Dragon Lord generally makes things harder in exchange for more rewards. The first stage will always be a Dragon Lord option, with everything else being your choice besides the last one. I suggest avoiding Dragon Lord stages until you hit the cap, since that will give better rewards, though the choice is up to you.
Most of the other mechanics are pretty straightforward, except there are a couple things to note. The optional objective will remain the same between matches until you hit a boss. In addition to that, making a stage elite will give a substantial increase in gems, though I only suggest doing that on the fancy looking chest.

To maximize time, be aware of the things around you as well. I’ve ran into a lot of rare spawn enemies that give cash/lots of loot, along with Kwartz, which always spawn a badass when you break them.
Side Quests
To maximize loot, you’ll want to figure out how to accomplish every side quest. They roughly double your reward by giving you a second die for currency, making them worthwhile to master. Another helpful hint is dying after the round finishes does not count against your lives. It’s best to make choices that will give the most profit, over just making it to the end.
Surviving
Generally speaking, stages will be a battle of DPS. Enemies should give you relatively quickly, so you want to kill them first or know how you’re going to survive being downed. Thankfully, this isn’t too bad and boss stages refill your ammo for free, making it pretty easy to burn the vast majority of enemies.
Most issues won’t come from normal enemies, but rather bosses. Unfortunately there is no catch all way to overcome them, so my advice is to learn their mechanics and come up with a strategy to beat them. Since there are only three that really stand out, you can find the strategy for each below.
Boss Guide
Son of a Witch

If you’re reading this guide there is a good chance you’ve fought Son of a Witch. The boss isn’t much solo and his last phase is a joke, though his shield mechanic is obnoxious and makes this fight needlessly tedious. The best advice I can give is to plan ahead and make sure you have something to deal with his bird.
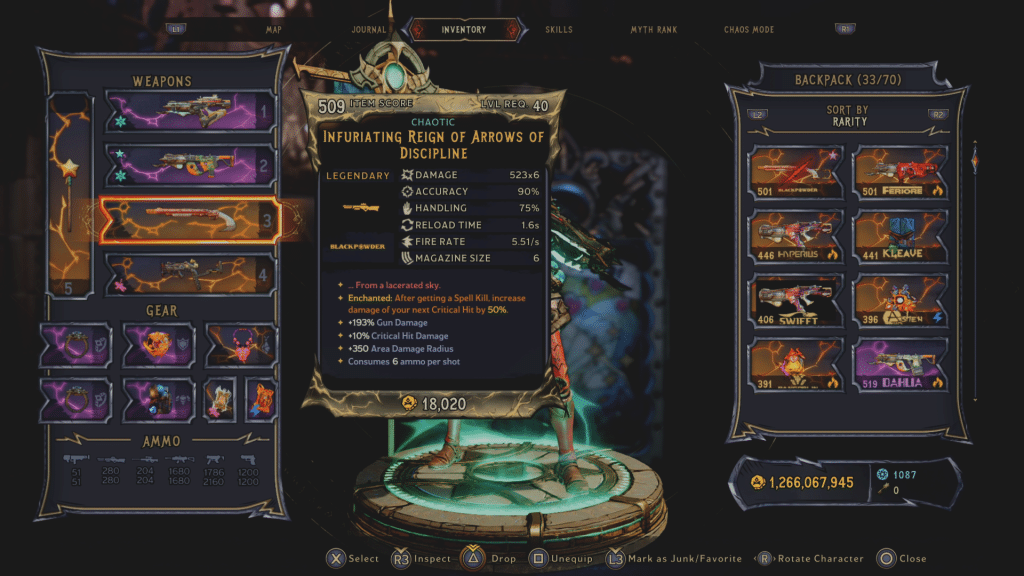
In my case I used the legendary shotgun Reign of Arrows. The downside to this weapon is that it burns ammo fast, but it acts as a great way to get some much needed burst damage. Since the attack rains arrows on the enemies, it will often kill the bird while damaging him, making it extremely valuable. Poisonous Cloud, Twister and anything that really damages things over an area are a must to quickly maintain damage. All you need to do is get him to phase though. Once both shields are gone, he is just a slightly annoying enemy.
Dry’l
This is another fight that comes down to how much burst damage you can do. Thankfully, only the second phase is annoying and even that has some tricks to it.
The general plan for Dry’l is to start by killing every add he spawns. They will die fast and he generally can’t deal enough sustained damage to down you with a decent build without them. The first phase should go quickly, it’s the second that is a problem.

The trick to the lightning section is to hug the back wall. If you stand there he can’t actually hurt you, only his adds. Quickly kill them, deal damage and try to bunch his spears on one side. The idea is to ignore them, damage him and ideally get him to phase without too many problems. Once he moves, run across the wall to the other side of the map and eventually the spears will disappear, allowing you to do it again. Finally, since his last phase is fire, the ice attacks should melt him pretty quickly.
Banshee
Banshee isn’t really that bad, per se, she can just down you very quickly. Similar to Son of a Witch, she is super easy to melt with Reign of Arrows. Since she stays in largely one spot, it’s a simple strategy that will deal damage to her and kill adds without really thinking about it.
Rewards
Unlike the rest of the game, Chaos mode has a unique level of gear called Chaotic. It barely drops at a low level, with higher levels becoming increasingly common. Eventually you’ll unlock a tier above that, Volatile, which is the best loot currently available in the game.

The nice thing about Chaos mode is the final section allows players to select which type of loot they want. This will use the currency you obtain throughout the run, which can only be used on this run so you might as well spend it, to get whatever you want. It also helps to open the chest first, as it won’t exit the area and give you more to spend.
For type, it hinges on what you need, but I would focus on things in the gear section. Good jewelry is hard, with the average run giving about 12 pieces. It will still likely take a while, though little things like gun damage and SMG critical hit damage will help you substantially.
By doing this a bunch you should obtain some extremely powerful gear, ideally hit 20 for the trophy/achievement and be the biggest badass in the Wonderlands.
