
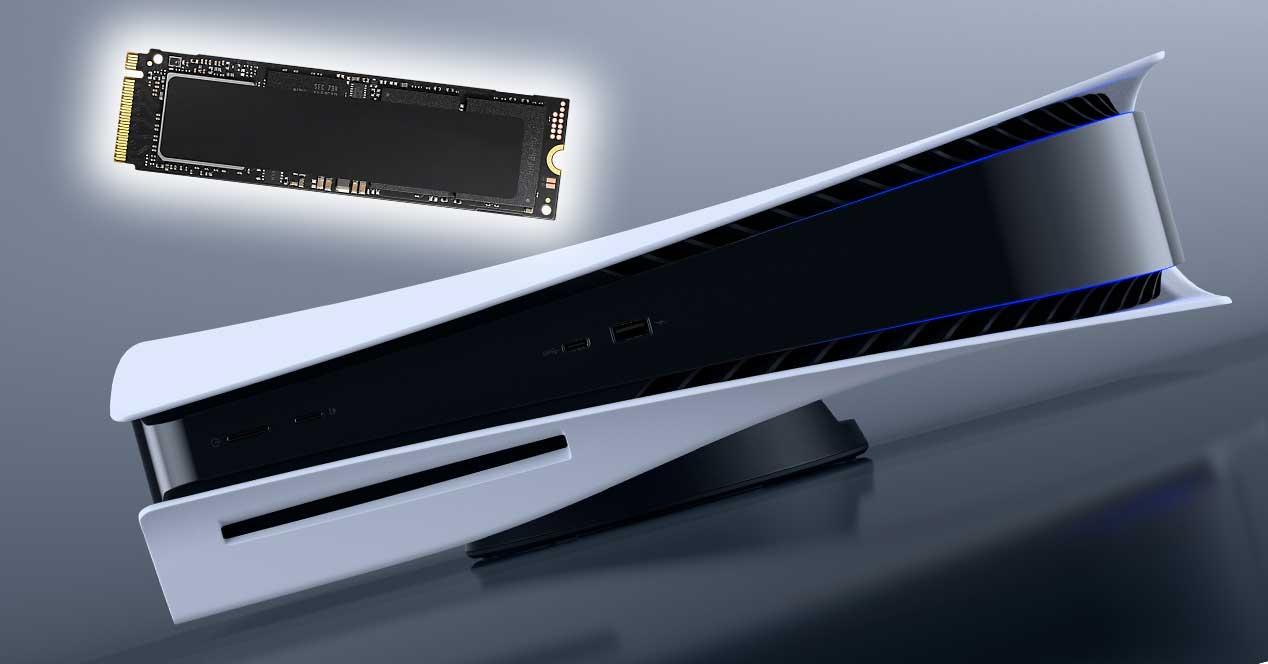
With Sony finally releasing the beta firmware that enables M.2 NVME SSDs on PlayStation 5, there has been a lot of questions about it. With this in mind, we did a brief guide on the best M.2 NVME SSD options that are currently on the market, including various sizes and companies. But, getting the drive is the easy part.
For many, the real battle is replacing the actual drive. Some in the beta test have already struggled, with more expected when the feature finally releases. This can seem intimidating, especially with such an expensive device, but it is surprisingly easy.
Without further ado, here’s a short guide on how to add an M.2 NVME SSD on your PS5:
Requirements
- #1 Phillips screw driver
- a M.2 NVME SSD that is PCI-e Gen 4 that has a read speed of at least 5,500MB/s
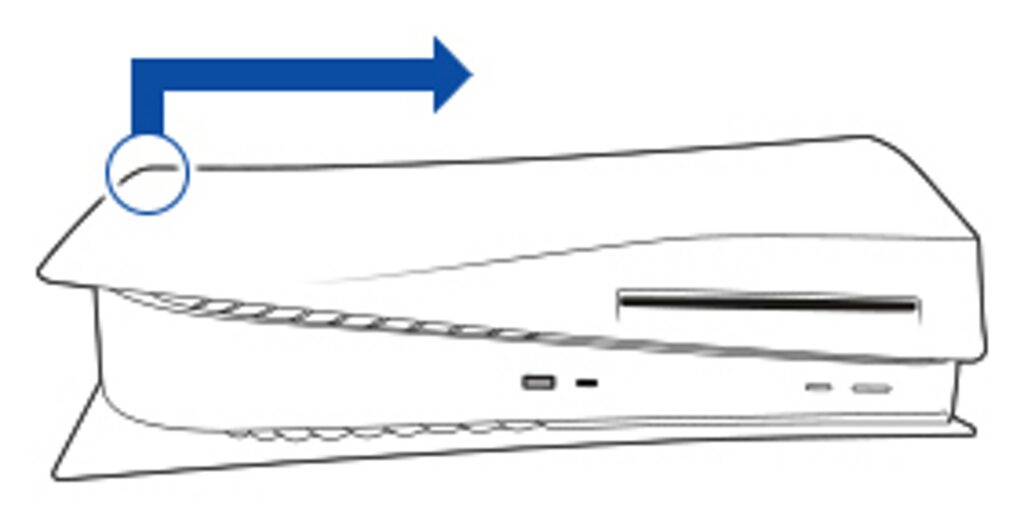
- Lie your PlayStation 5 down so it resembles the picture above and then pull down on the cover.
- Lift the upper left corner of the faceplate gently towards yourself.
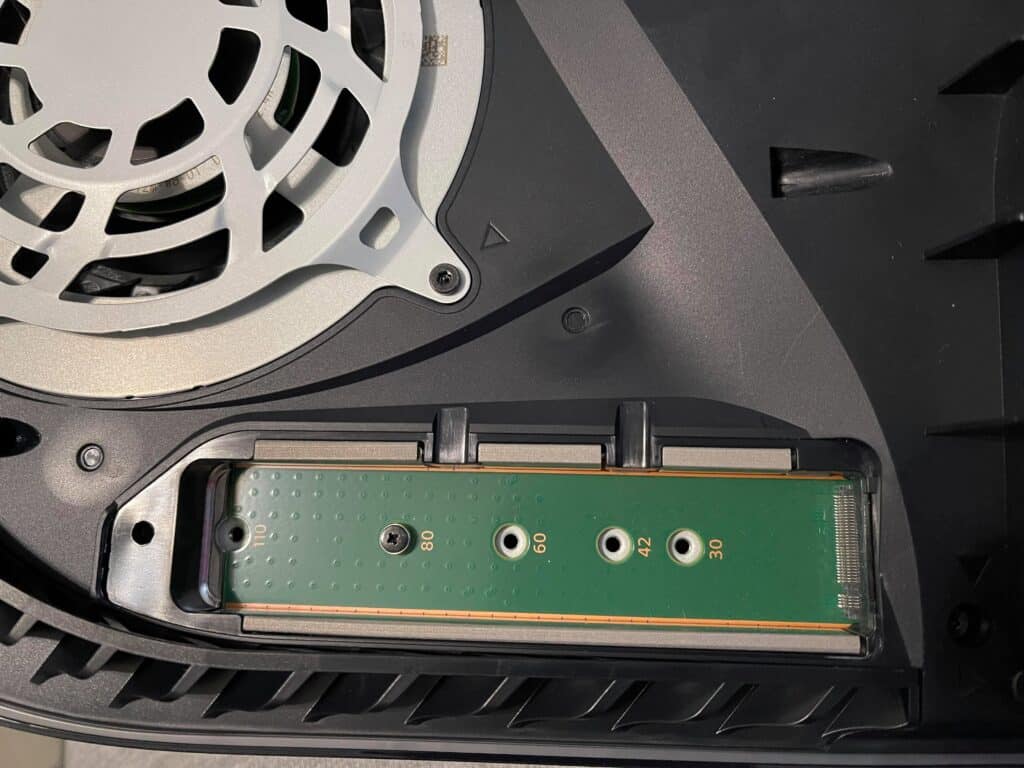
- Look for a rectangular metal plate that covers the expansion slot with a screw.
- Using the #1 Phillips screwdriver, remove the screw and open the cover of the expansion slot.
- Remove the screw on the expansion slot; the screw will secure your M.2 SSD
- Insert your M.2 SSD diagonally to the connecter and push it firmly to make sure it’s inserted.
- Use the screw to fasten it and secure your M.2 SSD.
- Replace the cover and slide it to put t back to place.
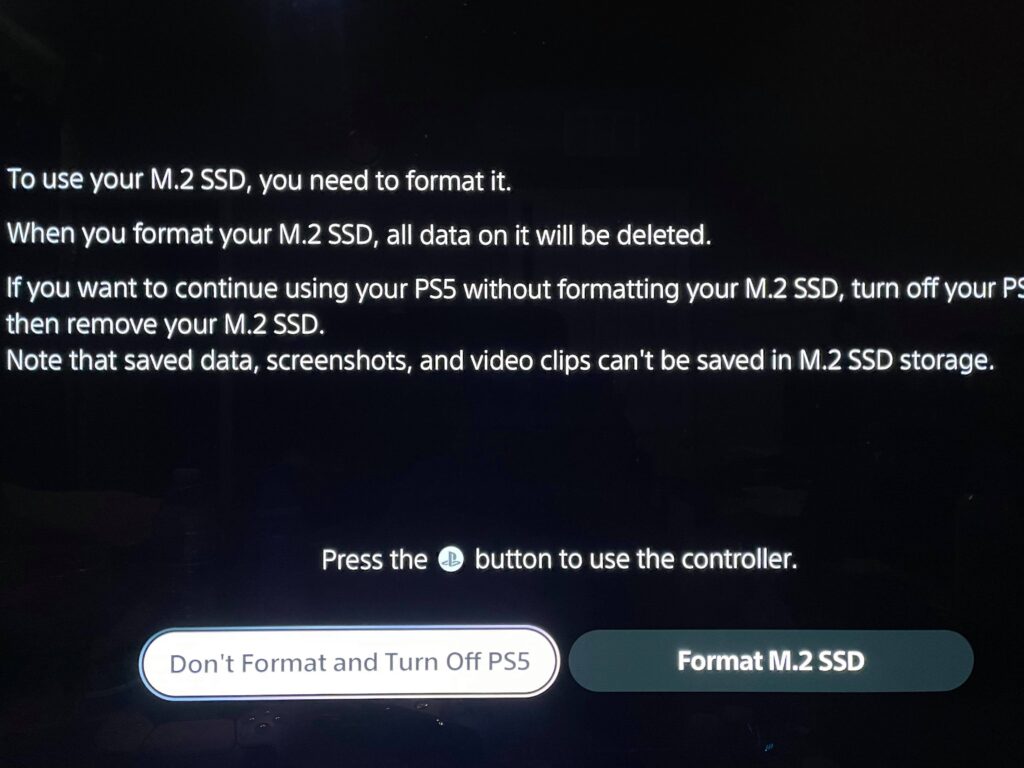
- Turn your PS5 on and it will ask you to format the M.2 SSD before you can use it.
