

Destiny 2‘s latest dungeon is making a lot of waves. In addition to being one of the hardest contest modes to date, with the first clear taking longer than a number of actual raids, it’s a lot more complicated than the standard dungeon. With various mechanics, tools, and a lot of experience needed, we wanted to make a quick guide to explain how to overcome this amazing experience.
How to Complete Vesper’s Host
Explanation of the Core Mechanics
Unlike most content in Destiny 2, Vesper’s Host utilizes the same Scanner, Operator, and Suppressor mechanics found in Deep Stone Crypt, and Operation: Seraph Shield. For this reason I wanted to highlight how these mechanics are the same, but also functionally different.
Before getting into the specific mechanics, there are a few changes with the system itself. The biggest is having a set amount of time, which kills you if it reaches zero, to use said mechanic. Depositing it, or walking through a white barrier will remove the buff. Unlike Deep Stone Crypt, it can be collected as soon as it’s deposited, so feel free to dunk/grab as needed.
Scanner

Instead of the object itself glowing, players need to look at their radar to see which locations are active. Unknown locations will have the incomplete yellow icon, active locations will turn solid white, and inactive locations will disappear entirely.
To determine which location is active, simply walk up to the terminal and it will make a sound. Please note, you need to essentially stand on the object for it to change. Triggered locations also persist until the mechanic is complete, or someone resets it by hitting the wrong location.
Operator

Operator works exactly the same way as previous missions. For those unfamiliar, once someone has Operator they can shoot the panels pictured above. Hitting the right panels will allow players to progress until the mechanic is complete, whereas hitting the wrong locations is an instant death.
Suppressor

Suppressor is incredibly straightforward. Pick it up, push the grenade button to summon a double, pictured above, and then shoot it to stun things in an area.
Transversal One
The first transversal area essentially explains Scanner, and Operator for Vesper’s Host. Simply run around with one, and then shoot the panels that turn white on your radar to open the door.
Vesper Station
This encounter starts with a wave of enemies, and a Brig to defeat. Once everything is dead a Vandal will spawn in the middle with Scanner. After it dies three rooms will open. One to the top left (Mind), bottom left (Lung), and bottom right (Heart). These names come from the icon above the room, so if you’re ever unsure just look above it.
I personally think Mind, Lung, and then Heart is the best rotation, through it ultimately depends on your team. The only thing I will note is each completed room spawns a Brig, so doing them all at once is extremely risky.
Completing a room is rather simple. Kill every enemy in the initial section to unlock the next room. There you’ll find two terminals, and a bunch of enemies. Clear the two bosses, get Scanner, and figure out which of the four terminals are active. After depositing Scanner, you need to find Operator. For Mind it spawns behind you, Heart is in the room to the right, and Lung is in the objective area. After it dies, activate the terminals to unlock an energy core.

Each core has a little over a minute to go from this location to the dunking point in the middle (behind the white orb pictured above) of the room. This can be extremely difficult, as picking it up gives Radiation (ten stacks kills), and a bunch of enemies spawn. In the initial room you also need to kill a Brig to unlock the deposit point.
If you’re following the Mind, Lung, and Heart we suggest, it helps to deposit Scanner in the inner terminal. This should make it appear in the outer terminal for Lung. This doesn’t make a difference for solo, but in a team it makes it easier to call out the room correctly.
Heart is the easiest of the three locations, but be warned the enemies on the ascent can be brutal, and the final dunk summons a larger Brig. Once all three points are dunked the encounter will end, and you can progress to the next location.
Transversal Two
The second transversal is different from most Bungie has made. It’s still a puzzle, just not a jumping puzzle.

Basically, players need to deposit energy cores in various terminals throughout this location. The first orb spawns by three in the top left area, and goes in the first dunking point in the locked room to the right. The next energy core enemy will spawn in that room, with the next terminal being behind the locked room to the top left of the first terminal (if you leave the left side it’s straight ahead, or if you go straight ahead it’s to the left). From here the remaining rooms can be found going forward.
The only thing to keep in mind is the boss location, and door energy. Teams are given a finite amount of energy, which is used each time a door is activated. To get the energy back, simply interact with the door again to use the energy elsewhere.
Raneiks Unified
Raneiks Unified is a boss that seems a lot more complicated than it actually is. To start, keep killing enemies until Operator appears. When it dies, collect the buff, and then deposit it in the terminal.

After this a special enemy will spawn in the middle. Killing it will teleport everyone to the upper section.
Once up there a fleet of Shanks will be ready to attack. This isn’t too bad, though the Explosion Shanks can cause an issue. Once they’re dead Suppressor will spawn near the boss. Kill it, get the buff, push grenade when close, and then shoot the body double. If done correctly the boss will split into a bunch of different Servitors.

What you need to do is find the two Servitors with an orange dot on them. It will look like the two pictured to the left. Once found, look at them to see their name. It should be Raneiks, followed by a number. Please note, people think the dot location indicates its number so you don’t need to look at its name.
That number is used on the terminal below, with a total of four numbers being needed. The remaining two are obtained by simply repeating the previous steps.
When the full code is entered simply kill the single Suppressor Shank, and Suppress the boss. This will split it into the various Servitors, which will start damage. Odds are Tether will make this fight extremely easy, with the current meta being Behemoth Titan.
Transversal Three
The final Transversal section is a simple jumping puzzle. The lightning bolts will kill if directly hit, and touching them will slowly kill you. Just wait it out, and eventually you’ll get to the boss.
The Corrupted Puppeteer
The final boss kind of pools everything together for a climatic conclusion. This all starts with a room where you need to use Scanner, Operator, and Suppressor.
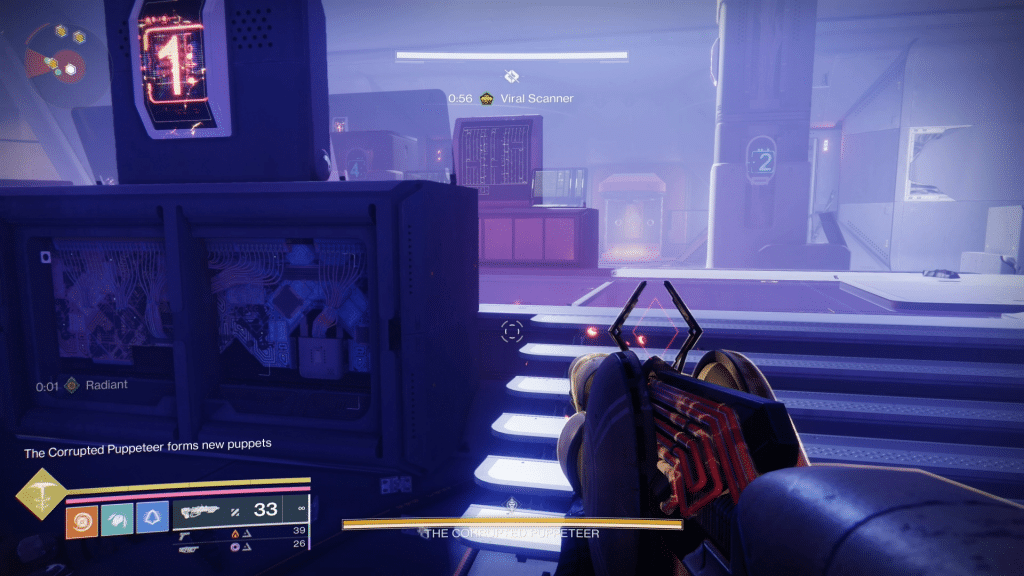
At first players will get Suppressor, which is used to stun two copies of the boss. Be warned, these enemies have Radiation fields, and will kill you once it reaches 10. When both die another enemy will spawn with Scanner, which is used to determine which number is correct. Kill another set of enemies to spawn Operator, and shoot the four terminals with that number on it.

Doing this will unlock the lower level, where you need to find the boss. After this, look for the side with glowing lights, descend, followed by heading down the hallway. This will always be where the boss is.

When you’re in the same room as the boss, get Operator and shoot the four terminals. This will cause four copies of the boss to spawn in the room. Use Scanner to determine which boss is the correct one, and kill it. If done correctly, an energy core will spawn, and if done incorrectly the time will drop to a couple seconds.
After the boss is damaged, simply go down the lower path to the other room, and repeat the previous steps. Please note, this fight is a lot easier if you deposit every buff before depositing the energy core. Doing that will save you from having to find them before going to the other room.
After doing this twice, head to the starting room in the lower section where a portal will appear. Entering it takes you to the original starting room, with the gate you initially entered opening. When everyone enters it will push you to the damage.
The fight itself is deceptively simple. A lot of people say precision works best, and there is a strong emphasis on killing copies. The goal is to kill enemies, not die to the lightning attacks, all while damaging the boss. After a period of time one will drop an energy core, which needs to be deposited to the left. Doing this will start another damage phase, after which you go back down the hole and rotate until the boss is dead.
